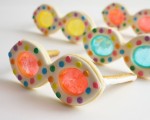
Summer Sunglass Cookies – Summer Cookies Recipes
Summer Cookies Recipes. These retro spotted sunglass cookies almost look like the real thing. Melted candies make yummy edible lenses and multi-colored sprinkles create quick polka dots. A perfect treat for any summer party table.

YOU WILL NEED:
-
- 1 RECIPE CAKEGIRLS SUGAR COOKIE DOUGH
- HARD CANDIES (SUCH AS JOLLY RANCHERS)
- SMALL BREADSTICKS (SUCH AS WHEAT THINS HONEY STIX)
- BIKINI TOP COOKIE CUTTER
- 1 1/4″ OVAL COOKIE CUTTER
- 2 BAGS ROYAL ICING MIX
- SQUEEZE BOTTLES
- EDIBLE PASTEL CONFETTI
- DISPOSABLE PIPING BAG
- 1/2 SHEET TRAY COVERED IN PARCHMENT PAPER
- TOOTHPICKS
STEP 1: ROLL, CUT AND BAKE COOKIES – Summer Cookies Recipes
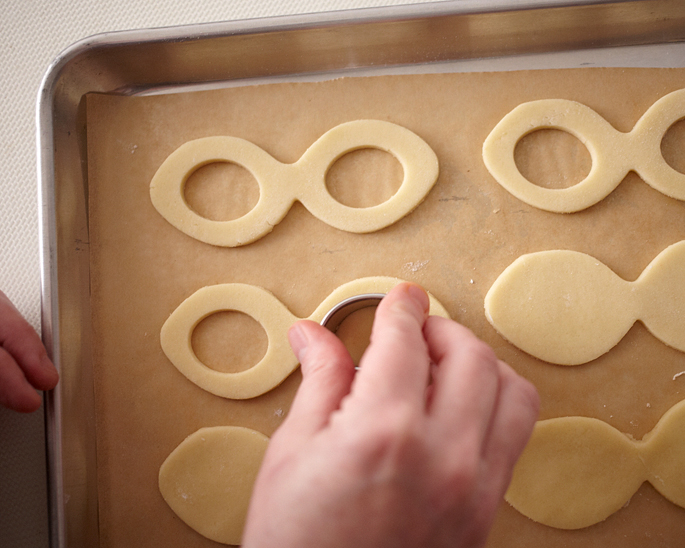
Prepare the cookie dough per the recipe and chill for at least 3 hours or overnight. Remove from the fridge and let sit for 10 minutes. Cut the dough in half and place half, wrapped in plastic, back in the fridge. Roll the remaining dough out on a heavily floured surface to 1/8″ thickness. Use the bikini top cutter to cut and transfer the cookies to a 1/2 sheet tray (Note: the dough will be a little bit firm when starting to roll it out. Just keep going because soft dough is much harder to manage. Use as much flour as you need to keep the dough and rolling pin from sticking. Just wipe off the excess flour from the dough before cutting out the shapes)


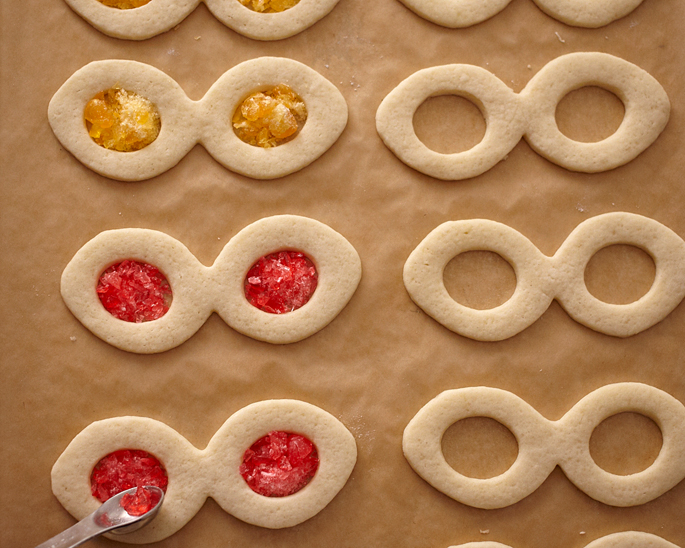
Once on the tray, use the 1 1/4″ diameter oval cutter to cut the center of the glasses out and remove the dough. When finished, place any remaining dough and the tray of cookies in the fridge to chill for 15 minutes while you do the next step. Preheat the oven to 350 degrees.
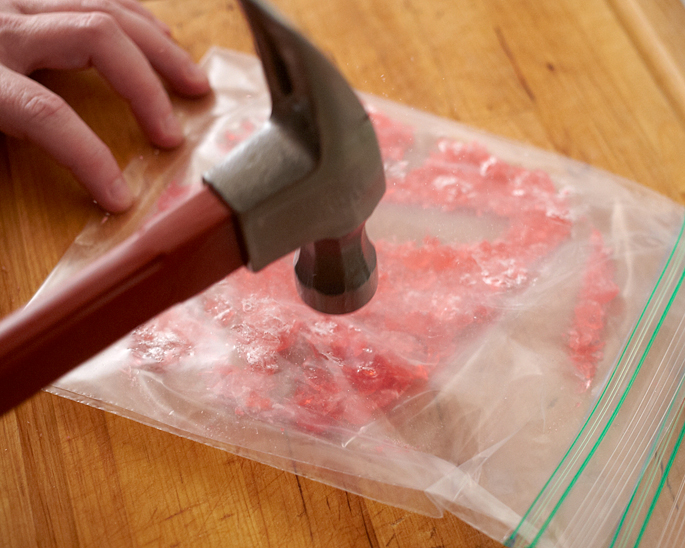
On a cutting board, separate your hard candies by color and place each group in a double lined zip topped bag.
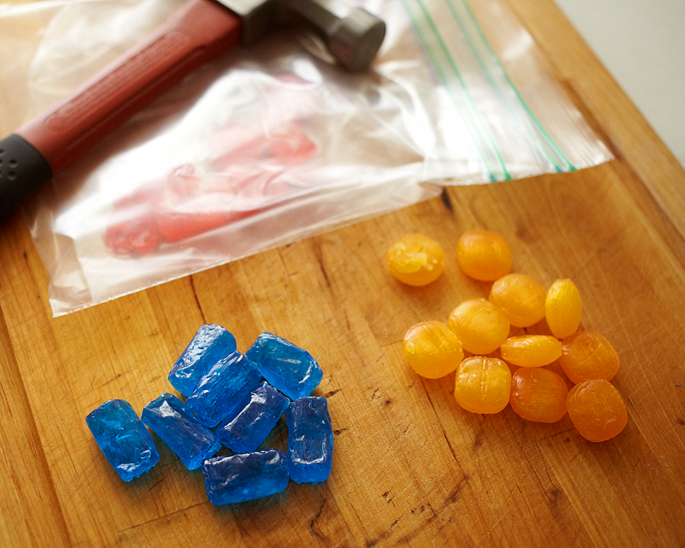
Use a hammer and tap the candies until they are crushed into very small ground pieces.
After chilling for 15 minutes, remove the cookies from the fridge and place them in the oven to bake for 8 minutes. After 8 minutes, remove the tray and scoop 1/2 tsp of crushed candy into each oval cavity. Bake the cookies for an additional 4-6 minutes until the edges are lightly golden and the candy is melted. (Note: When the cookies are out of the oven, use a toothpick to spread any gaps in the melted candy or to pop any bubbles). Let the cookies cool completely on the tray.
STEP 2: DECORATE THE COOKIES WITH ICING
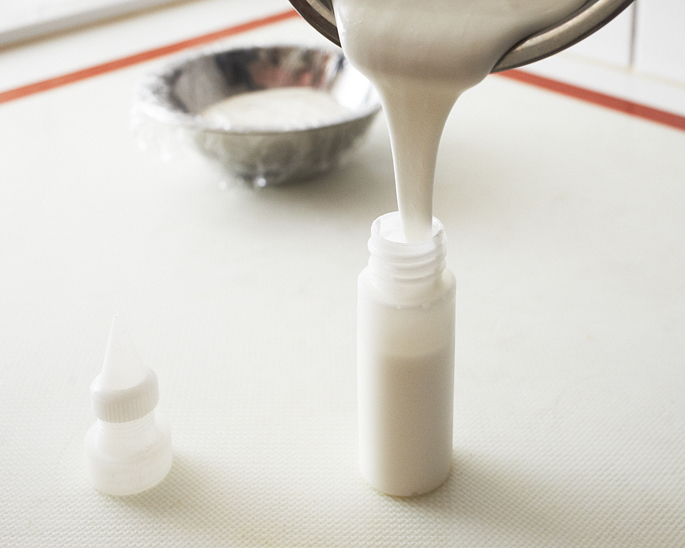
In the bowl of a stand mixer, mix one bag of royal icing with 9 tablespoons of water. (The icing should be wet and soft but not excessively runny so add 8 tablespoons of water and the 9th one as necessary). Place the icing into a squeeze bottle and place the cap on. Cover any remaining icing with plastic wrap pressed directly on the surface to avoid drying out.
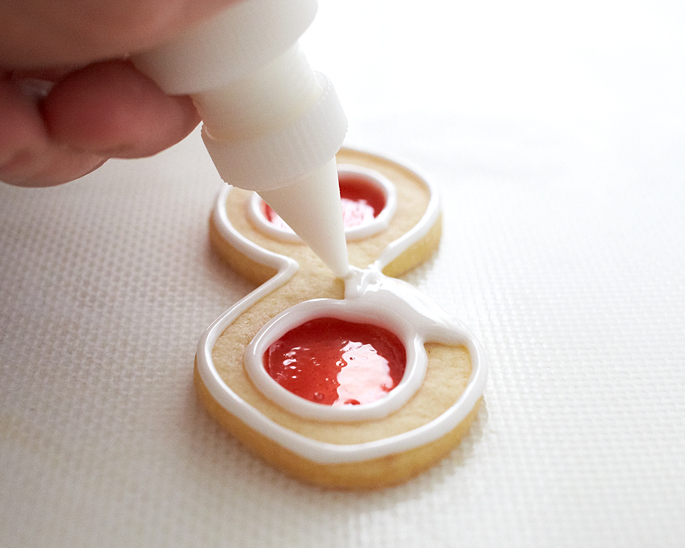
Outline the edge and inner rings of the cookies and then immediately zig zag icing to fill in the rest. (Do not overfill the cookie or the icing may drip off. Instead, fill it moderately and drag the tip of the squeeze bottle through any gaps to help spread the icing)
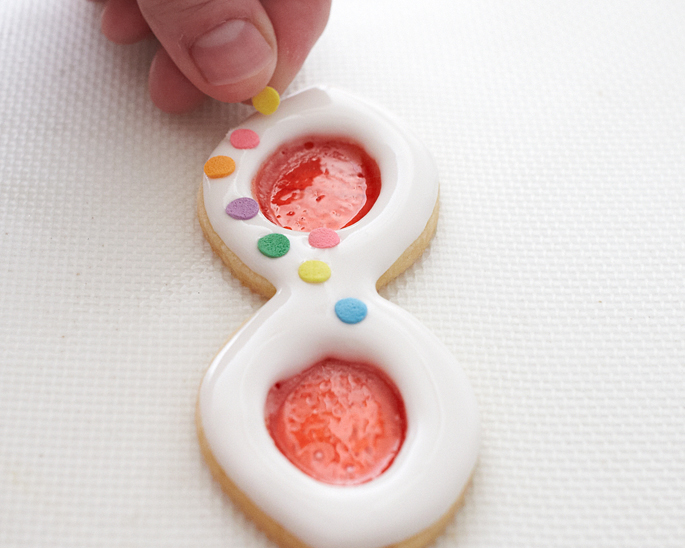
Immediately place confetti sprinkles on the wet cookie. Repeat with the remaining cookies and set them aside to dry for several hours.
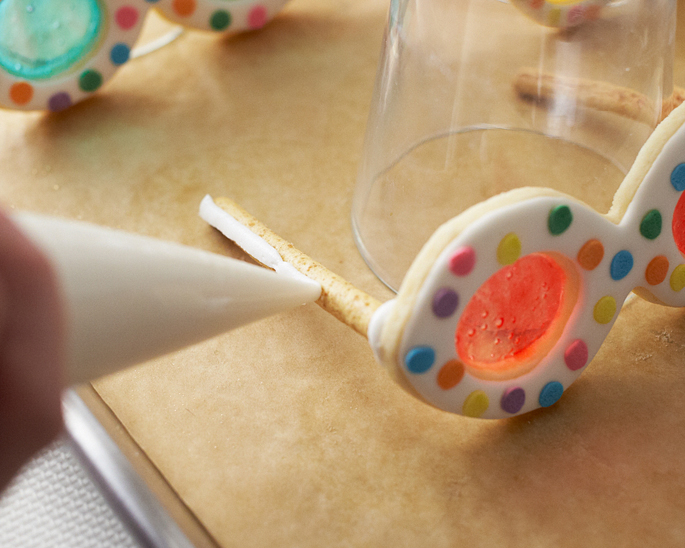
STEP 3: FINISH WITH BREADSTICKS
In the bowl of a stand mixer, prepare the second bag of royal icing with 6 tablespoons of water. Mix on medium until fluffy. Place in a disposable piping bag and pipe a generous blob of royal icing on each bread stick.

Prop the cookie on the front of an overturned glass or soup can and attach the stick to the back of the cookie. Repeat on the remaining side.
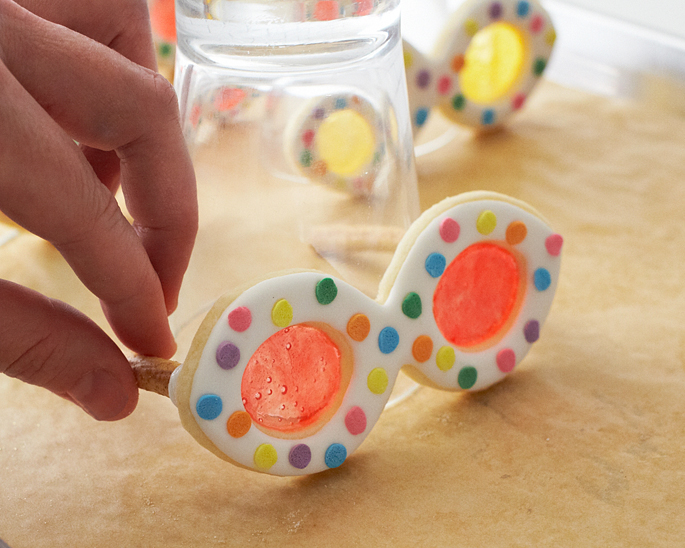
Pipe a line of royal icing up the breadstick to complete the look. Let dry for several hours.
The materials to make this project can be purchased from the Cakegirls website at http://thecakegirls.com/.
If you try this or other summer cookies recipes please leave a comment and a picture below. We’d love to see your results!
Edible flowers are perfect for your summer cakes! Learn how to use them by reading this article on edible flowers.