

Created by Edible Artists Network for the use of Sugarveil icing on the Sugarveil mat. A client request lace on a wedding cake and I immediately thought of Sugarveil. My first attempt a few months ago was a complete disaster, but I was determined to master this wonderful sugar craft.
I broke down and ordered the Sugarveil mat.
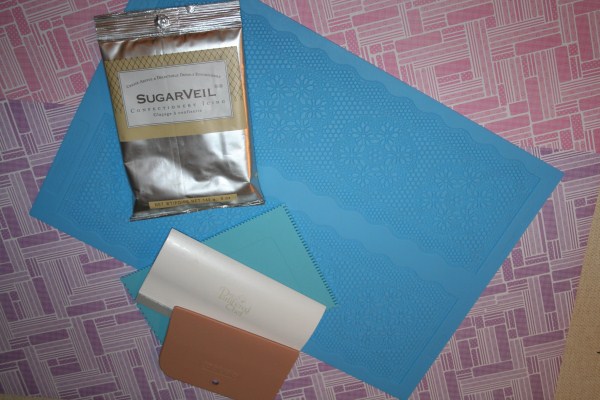
Materials needed:
One Cup Sugarveil
1/3 Cup boiling water plus 2 tablespoons boiling water
Sugarveil mat
Varies size scrappers (I didn’t purchase the 12” Sugarveil scrapper)
The day before – place the Sugarveil in a large mixing bowl and add the boiling water, mix slightly by hand to incorporate, before placing on your mixer, then beat on high speed for 4 minutes. After 4 minutes you will notice a smooth glossy finish with stiff peaks similar to egg whites.

If you want to color your Sugarveil, now is the time , (only use gel colors, do not use liquid color as it changes the consistency) You may also use powder colors, but use this prior to adding the water and be sure to mix well. Perfect for those bold colors such as black or red.
Then scrap down the side of the bowl and cover with plastic wrap overnight. The next day, be sure to mix the Sugarveil for at least a minute prior to use, to regain the smooth consistancy (and each time thereafter when is sits for any period of time).
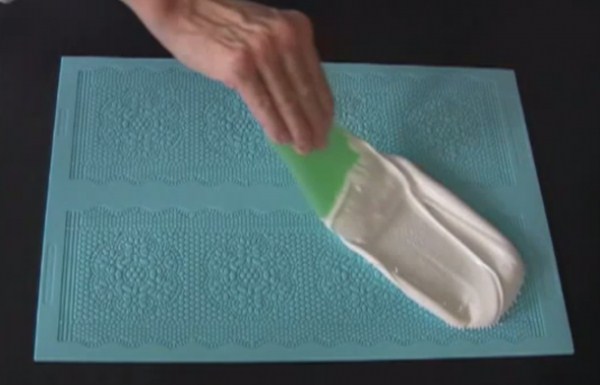
Next, take a small amount of Sugarveil and spread onto your Sugarveil mat, making sure to push the mixture into every crack and cereous of the mat.
Photos courtesy of Sugarveil. I neglected to take a picture of this step.
Once done, make sure to take your scrapper and sweep across the entire surface.
• Important tip – make sure to complete this process otherwise your mat has residue and will make it impossible to peel your Sugarveil from the mat.
Once complete it should look like this. Depending on your weather conditions it should take about 3-4 hours to dry. Lightly touch the Sugarveil, if it is smooth and not tacky, you’re ready to begin. If the surface is tacky, wait a little longer. To test, turn the mat over so the Sugarveil is touching the surface.
Take your finger and peel a small corner of the Sugarveil from the mat, if it releases easily, you’re ready to remove from the mat.
Important note, always remove the mat from the Sugarveil, and never remove the Sugarveil from the mat.
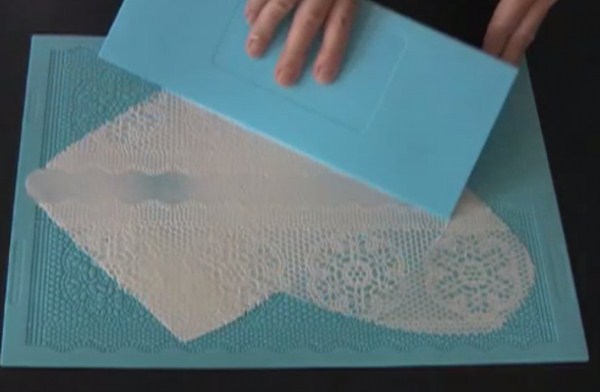
Figure 1 If the corner peels easily like this your ready to begin.
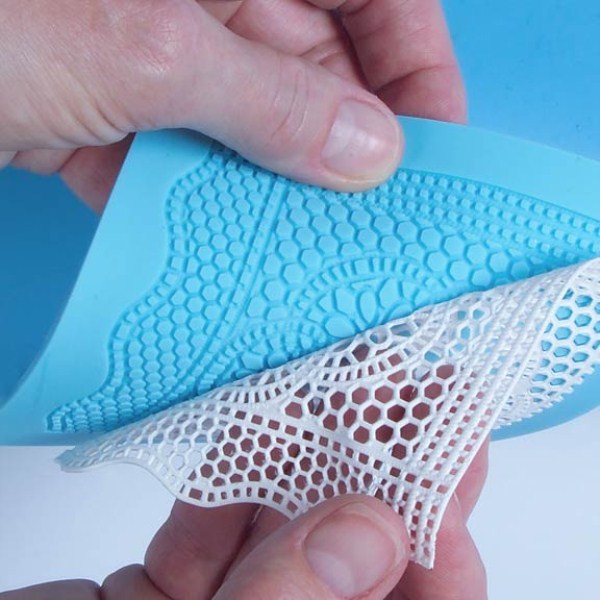
When your Sugarveil is dry and ready to remove, working with your mat touching your surface, peel a small corner of the Sugarveil with your large scraper, hold down the Sugarveil to the counter, and then pull the mat away from the Sugarveil a little at a time, repositioning your scraper every few inches.
Important note – don’t rush this part, take your time, peeling the veil slow and steady will ensues an easy release.
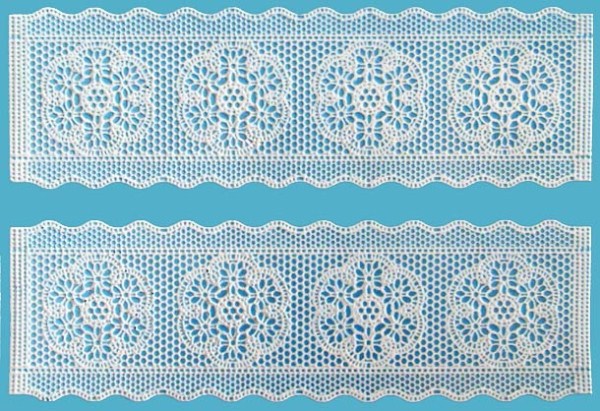
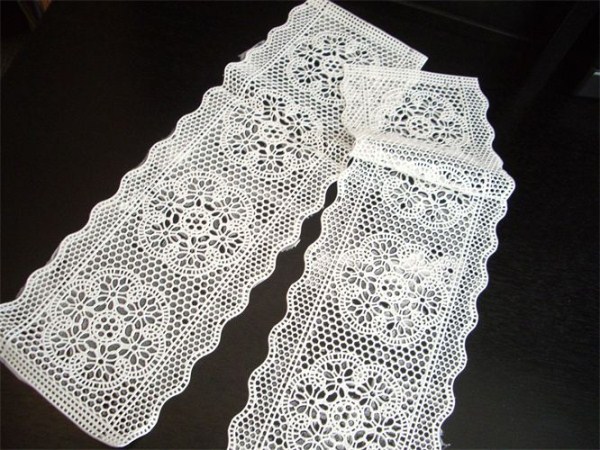
Once you’re done it should look like this –
And here is what it looks like on the cake

Important Tips: It’s only sugar, don’t be afraid.
Before using stored Sugarveil – mix by hand for 1 minute to warm up the Sugarveil and restore to a smooth texture.
Using a rubber spatula, ideally, apply the Sugarveil to the top section of the mat for your first thin layer followed by 2 additional thin layers using the scraper to push the Sugarveil into and not ONTO the mat, dragging down the length of the mat, ensure you are not scraping it OUT OF the mat but pushing it in. Always scrape any excess Sugarveil left on the scraper edge back into the bowl between sweeps.
Use the scraper to spread the Sugarveil from all angles so all areas of the mat are filled.
Don’t forget to remove excess Sugarveil between swipes.
Use a damp cloth to clean the edge of the mat (be sure your cloth is nearly dry as adding any water to the Sugarveil at the time will affect the outcome.
Storing:
Store Sugarveil up to 3 weeks in an air tight container using parchment paper between each layer of Sugarveil.
Unused Sugarveil may be stored in the refrigerator for up to 10 days (for best results) be sure to mix thoroughly prior to use.
You may freeze Sugarveil for several months – be sure to include a piping bag with Sugarveil inside to container for moisture.
Use parchment paper, or any other grease proof paper, (to prevent sticking) – and lay out your Sugarveil, its okay to stack layers, and store in a large zip lock bag. If the lace sticks to the paper, rub your hands over the paper several times to heat it up. I never use the microwave as this reduces your “play time” when decorating.
Use only water to adhere the lace to your cake, NEVER use edible glue as it eats the Sugarveil (lesson learned). I also found if I simply refrigerate my fondant cake for a short while, the Sugarveil adheres without any water. Buttercream will NOT dissolve the lace.
Never use heat to dry Sugarveil – I simply left mine on the counter and went about my business. Heat makes it dry out too quickly and become brittle and harder to work with. To speed up the process you can use a fan. (No heat, another lesson learned)
One batch makes about 9 sheets of lace.
Cutting:
Use very sharp scissors and ensure your hands are clean and dry. Any grease, color or dirt will easily transfer onto the Sugarveil.
If you learn nothing else from this tutorial, please make sure to do the following.
On the final sweep to remove the excess mixture, wash and wipe your scrapper to ensure it’s clean and dry, and take one last long slow sweep of the mat to remove any excess Sugarveil. You want the blue part of your mat to be 100% clean. It is also important to go back and clean the edges of the mat with a damp cloth, to ensure easy removal.
Remember it’s only sugar, so have some fun and play, once you get the hang of it, you’ll be amazed at the designs you can create.
For more information or to purchase a sugarveil mat please click here.
Thanks for your help and for writing this post. It’s been great.
Thank you for sharing this article with me. It helped me a lot and I love it.