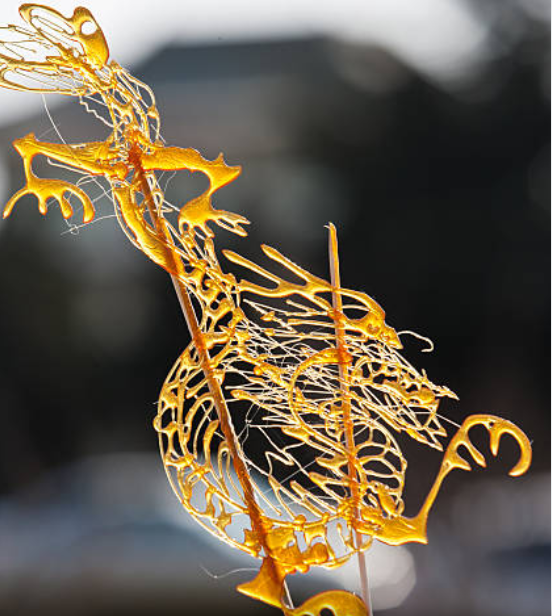
 How do you spin sugar for a croquembouche recipe?
Do you remember the first time you spun sugar for a croquembouche recipe? I remember my sister and me being so fascinated with how it was possible to create this delicate web of sweetness. The process is actually very simple! All you need are some basic ingredients and a little bit of patience.
Let’s get started!
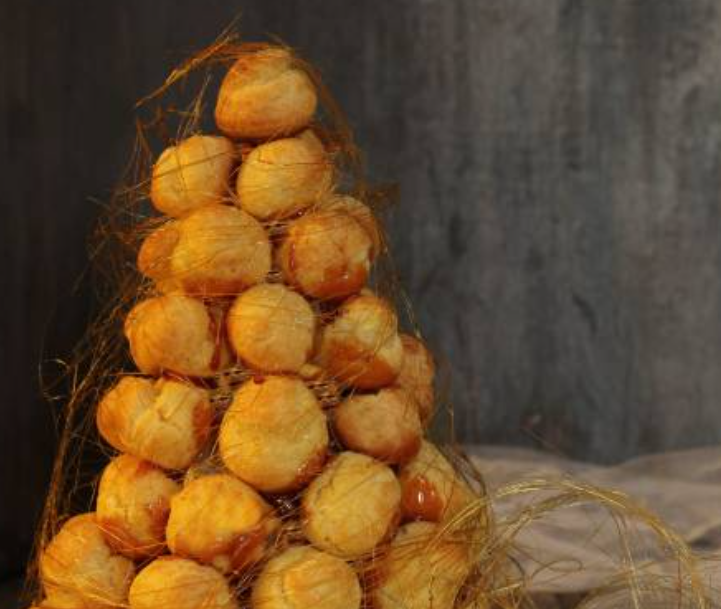
A croquembouche is a French dessert consisting of choux pastry puffs arranged in a cone and bound with caramel threads. In Italy and France, it is typically served during weddings and baptisms.
The term comes from the French word croque en bouche, which means “bite in the mouth.”
A croquembouche is a dessert consisting of cream-filled profiteroles arranged in a cone and coated in spun sugar. It can be embellished with sugared almonds, chocolate, and edible flowers, among other things.

Basics of a Croquembouche Recipe
To make a croquembouche, you must master three steps:
- Choux is a type of cream puff pastry. This delicacy’s main component is a light and airy pastry made with butter, water, flour, and a plethora of eggs, so it must be flawless.
Pastry cream, also known as crème patisserie, is a custard-like filling with a rich vanilla taste. It can be found in tarts and eclairs, among other desserts.
The “glue” that keeps this tower together is caramel or spun sugar. Proceed with caution if you’ve never worked with caramel before. Burns from caramel are quite unpleasant!
What exactly is Spun Sugar, and how does it function?
There are a few different techniques to spin sugar. One method is to spray caramelized sugar from a fork in a thin continuous drizzle, grabbing the strands as they approach you. This is not the method I recommend because it is far more difficult to master.
Instead, I’ll demonstrate how to spin sugar in a much more user-friendly and easy manner. It entails frantically sprinkling sugar across a rolling pin. You want your strands to be as thin as possible, but don’t worry if one or two droplets appear.
Getting Your Space Ready
Because spinning sugar is such a messy procedure, the first step is to cover your kitchen counter and floor with newspaper to prevent sugar spills. Arrange three or four saucepans on the paper-covered surface, with the handles pointing outward and extending over the counter’s edge. Coat the handles in nonstick cooking spray. Make sure you’re wearing an apron or clothing that can be easily washed because you’re likely to get sugar strands on yourself.
Recipe for Sugar Croquembouche
Combine 2 cups granulated sugar, 1/2 cup water, and 1/2 cup corn syrup in a medium saucepan over medium-high heat and stir until the sugar dissolves. Heat for 2-3 minutes with the cover on, then remove it and continue to cook until the sugar syrup reaches 310 degrees, stirring occasionally. Near the end, the sugar will begin to cook quickly, so keep an eye on it to ensure it does not burn. To keep track of the temperature, a candy thermometer can be used.
As soon as the sugar reaches the desired temperature, remove the saucepan from the heat and dunk the bottom in ice water to stop the sugar from cooking any further. Allow for the mixture to thicken for a minute or two.
Basics of Spinning Sugar
Place a clean rolling pin half-way over the edge of your kitchen work area. To hold down the other half of the rolling pin, use whatever you have on hand. You may also use pot handles or tape down wooden spoons if it’s easier.
The most difficult part of producing handmade spun sugar is getting the caramel to the right temperature. If it’s too hot or too cold, it won’t drizzle properly. It’ll take a little practice, but I promise it’ll eventually drip off the fork in a thin trickle, making sugar silk threads.
Hold the pan in one hand and a fork in the other. Using a fork coated in sugar syrup, stir the mixture. Remove the fork from the fire and position it 5-6 inches above the prepared pot’s handles. Quickly fling the fork back and forth across the handles. As a result of the sugar syrup, sugar strands should drape over the grips. If the syrup doesn’t produce any strands or if the strands have a lot of “beads,” let it cool for another minute. If the strands are lumpy and difficult to form, reheat the syrup briefly.
To make many fine strands of spun sugar, keep dipping the fork in the sugar and swiftly flicking it over the handles. At any time, you can take the sugar that has accumulated and shape it into balls, nests, or narrow tubes. Continue spinning sugar until your syrup runs out or you’ve used up all of your spun sugar.
Making the Shape for Your Croquembouche Recipe
Once you’ve dripped a significant amount of sugar over the rolling pin, slowly bring the ends together with your hands to form a loose ball of spun sugar. Individual spun sugar “halos” can be made by dividing the strands into small clumps, or a single large decoration can be made. Because spun sugar is so easy to deal with, don’t be afraid to experiment and see what you can come up with.
Finally, you have complete control over the shape and style. If the caramel has solidified too much and you need to add more sugar, simply return it to the fire for a few seconds to rewarm it.
One of my favorite sugar spinning vids from Good Housekeeping:
Can I store my spun sugar to use later?
Because spun sugar is sensitive to humidity and heat, I recommend making it immediately before you need it. You can keep it for a limited period of time if you have an airtight container. If you have desiccant packets, place them in the container with the spun sugar to help absorb any extra humidity.
When spun sugar is freshly made, it has the lightest and smoothest texture.
Try it for yourself!
I hope you enjoyed learning about how to make spun sugar. It’s such an incredible process and it takes a lot of patience, but the end result is worth all your hard work! If you want to try working with this sweet treat for yourself or if you have any questions at all, please feel free to reach out by leaving a comment below. We’re always happy when we get new people interested in baking!
Have fun making some spun sugar today – just remember not to eat too much because then that would defeat the point of making something as beautiful as this dessert!
For more baking basics read this article about tips and techniques.
[content-egg-block template=offers_list]

