Lily Sugar Flower Steps
By James Rosselle
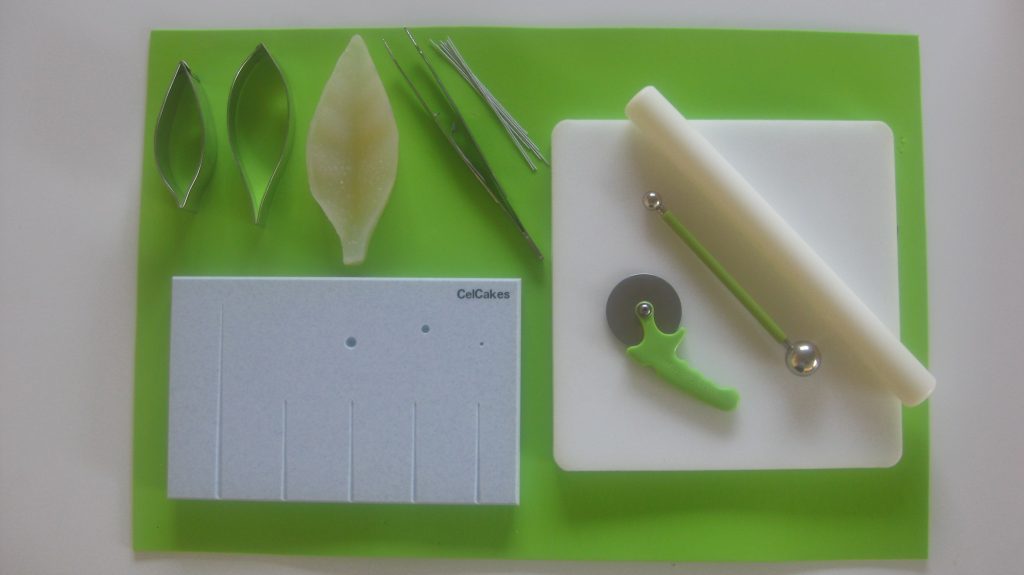
 You will need:
- Gum paste
- Groove board
- Rolling pin
- Lily cutter and Veiner set (www.nycake.com)
- Tweezers
- Ball tools set and mini pizza wheel cutter (www.nycake.com)
- 24 gage white wire cut into ¼
- A Foam pad
Set up your station.↓

The make-up of a Lily:
A lily flower has six petals (three large and three small), a center and six stamens. I will take you through the process of making this six petal blossom!
Step 1: Roll gum paste ↓

 Note: I use my line of Gum Paste (James Rosselle Gum Paste) which is manufactured by Fondarific (www.fodarific.com). After opening, the sugar paste needs to be conditioned. To starts, knead the sugar paste as you would bread dough. Next, add water to soften the sugar paste. Continue adding water until you reach your desired consistency. Add shortening to your hands should the sugar paste become tacky. Store unused sugar paste in an airtight plastic bag to prevent the sugar paste from drying.

Roll sugar paste over the groves of the cell cakes board. The sugar paste should be very thin, at least 1/16.↓
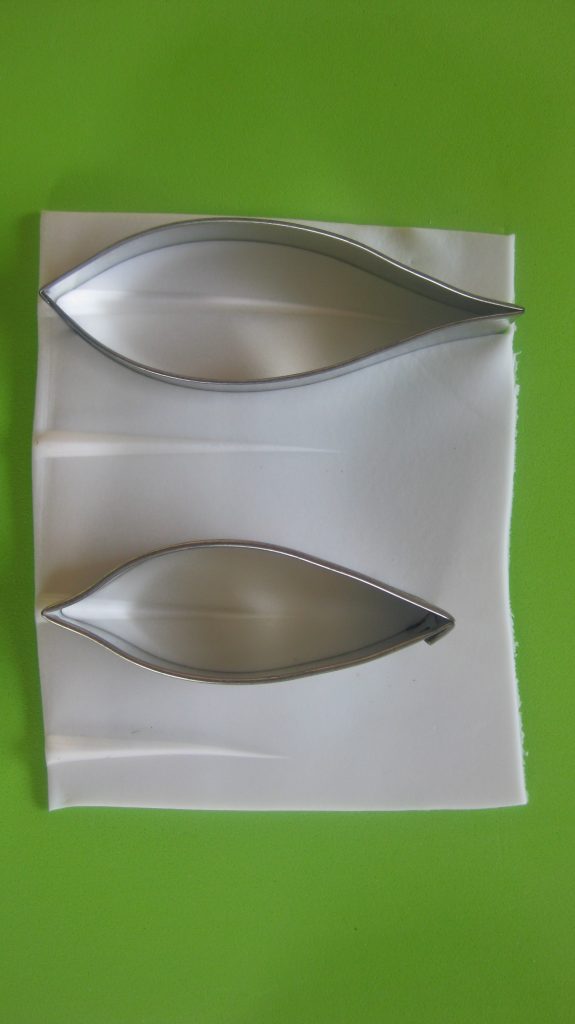
Step 2: Cut Out Sugar Paste. Cut out sugar paste using the Lily cutter set. The cutters set included two cutters, small and large. ↓
Step 3: Wire lily petals. After the petals have been cut, you’ll want to insert floral with through the center vein. First, dip one end of the wire in gum glue. Insert the glue end of the wire half way through the center vein of the petal.↓

Step 4: Thin edges of petal. Using a medium sized metal ball tool (part of my line at New York Cake) thin the edges of the sugar paste petal.↓

Step 5: Vein petal. Once the edges of the petal have been thinned, center the petal in the lily veiner and press. Press with a good amount of pressure making sure the sugar paste receives the vein impression.↓

Step 6: Veined petals. Vein all six petals, three small and three large.

Step 7: Dry Petals. Dry veined petals over night on a piece of bumpy foam with the tips of the petals curved back.↓

Step 8: Center of the Lily. You will need a piece of green sugar paste the six of a pea, a wire with a hook on one end and a pair of tweezers for the lily center.↓

Step 9: Lily center Continued. Taper the green sugar paste into a long teardrop shape to about one inch in length. Pinch the top of the sugar paste three times making sure the pinches are centered. Allow to dry overnight.↓

Step 10: Lily center continued.
What you will need:
Green floral tape, dried lily center, six brown lily stamens

Step 11: Lily center assembly. Tape the six brown lily stamens around the base oj the center with the green floral tape.↓

Step 12: Dusting
What you will need: soft tip brush, Honeydew Green petal dust, dried lily petals.
Dip the brush into the Honeydew green petal dust. Start shading the base of the petal using upward strokes. Shade the front and back of all six petals.

Step 13: Lily assembly
What you will need: green floral tape, complete lily center, and six lily petals that have been highlighted with the apple green petal dust.

Tape the three large petals to the lily center to begin. Follow by taping the three small petals. Continue taping until you reach the base of the wires.↓

Step 14: Finished Lily
The lily is complete!
 About the author:
Chef James Rosselle is a graduate of the California School of Culinary Arts in Pasadena and is passionate about where life has taken him. He has won all four of the Food Network Challenges in which he has competed. In 2011, James was named to the “Top Ten Cake Artists” by Desert Professional Magazine.
Please visit James at www.ellecakes.com.