Sponge cakes are, simply, a truly wonderful component of human culture. They’re a simple and straightforward way to make a delightful treat that you can share with a number of friends, especially when you’ve all got cups of tea. How nice!
Without further ado, let’s get into this article. We’re going to talk about how to bake a basic sponge cake from scratch, and give you a couple of tips and tricks along the way.
Making the Batter
While batter might not be the typical word to refer to the mixture that will become a sponge cake, it’s the word my grandmother always used, so we’re going to go for it. Again, on that subject, there are two ways to make a sponge cake batter: all-in-one, and step by step.
My grandmother always taught me the step by step method, so that’s the one that we’re going to write about in this article. That said, I learned the all-in-one method while in cooking classes at school, and it’s always worked well for me. Whichever method you use, I’m sure your cake will turn out wonderfully!

To get started, you’ll need:
- 225g softened butter.
- 225g golden caster sugar.
- 4 large eggs.
- ½ lemon, zested.
- 1 tsp vanilla extract.
- 225g self-raising flour.
- Splash of milk.
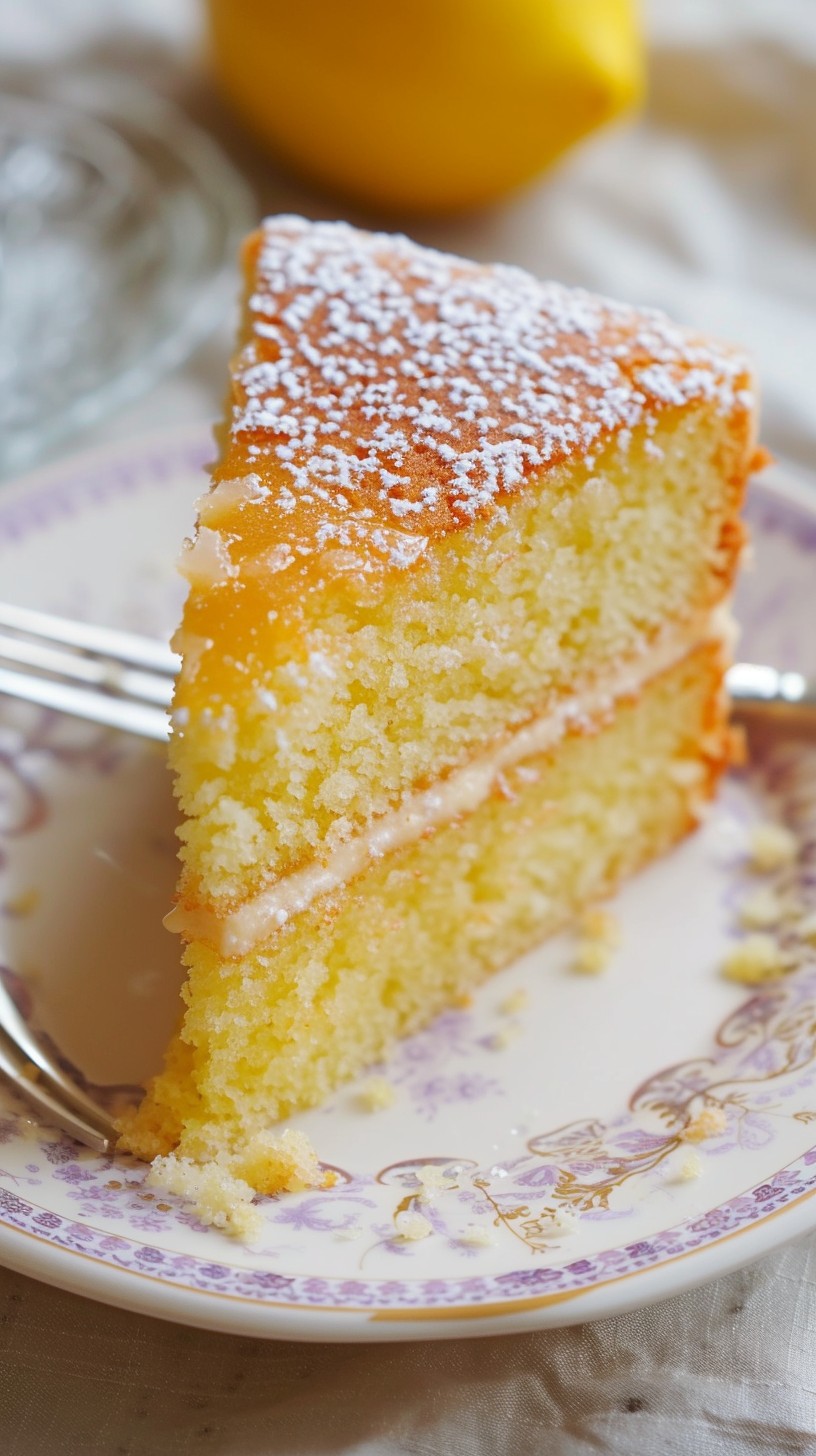
- Your choice of filling – I’d go for buttercream and raspberry jam.
- Icing sugar for dusting.
Switch to a whisk, and beat the mixture until the eggs are fully incorporated.
Next, add in the remaining ingredients one by one, whisking each into the mixture. Start with the lemon zest, followed by the vanilla extract, milk, and ending with the flour. I’d recommend ending with the flour because then you can feel free to beat the mixture until it’s smooth to ensure you’ll have no floury lumps in your cake. Beat the mixture until it’s combined and no dry spots remain, and then separate it evenly between your two prepared tins.
Baking
The baking of the sponge cakes can be the most nerve-wracking part of making them, though that needn’t be the case. Keep an eye on them and all will be well.
Place both sponges on the same rack in the oven for twenty-five to thirty minutes. After that time, the sponges should be golden brown, and a skewer inserted into the thickest part should come out clean, or at least with a couple of moist crumbs hanging on.
This is a pretty basic recipe, but first thing’s first, remember to turn the oven on to 180˚C, 160˚C fan, or gas mark 4. If you don’t preheat your oven nothing bad will happen, it will just be annoying – trust me. Similarly, make sure to grease or line two 20cm cake tins. Personally, I prefer spring-form, but silicon works brilliantly too!
Firstly, beat together the butter and caster sugar in a bowl. You can use an electric hand mixer and it will be easy, but a wooden spoon will do the trick just as well. After creaming the butter and sugar together, crack the eggs in one by one.
When you get to that point, remove both sponges from the oven and, keeping them in their tins, for now, place them on a cooling rack. After ten minutes have passed, take the cakes out of the tins and allow them to cool completely before filling. This short cooling-in-the-tins period allows the cakes to shrink as they cool, while the tins remain roughly the same size. This will make it much, much easier to get them out of the tins.
After you’ve topped one layer with your filling, place the second layer on, and dust the top with icing sugar for presentation. The cake will keep for three days in the fridge, though it almost certainly won’t last that long!
I love to bake cakes, as that’s something that I grew up doing, and I hope that came across in the article! The filling is where cakes can come alive, though a good sponge will enhance the whole thing to no end. However and whenever you’re making your sponge, try to share it with a friend and it may end up tasting a whole lot sweeter. Happy baking!