Nut butter is becoming bigger and bigger now. For example, there are a huge number of alternatives to peanut butter in supermarkets. You may be unwilling to pay a premium for these, however, and who could blame you? Luckily, using the KitchenAid grinder attachment, there’s a way to make your own.
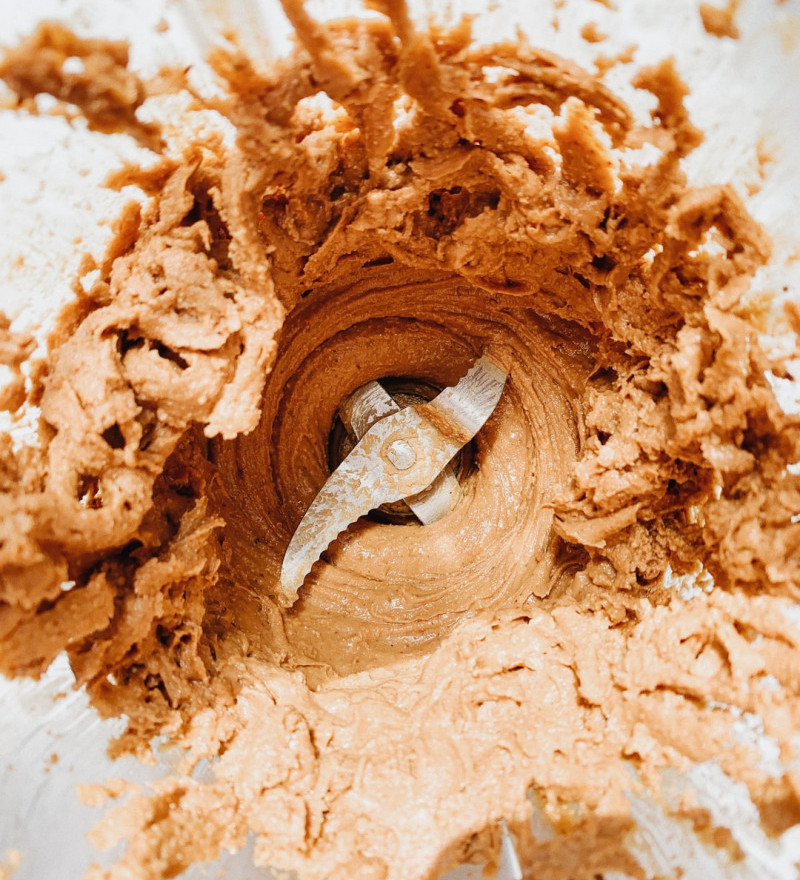
The KitchenAid grinder attachment will allow you to make homemade peanut butter as well as any other kind of nut butter, too. The basic recipe for peanut butter essentially relies on the fact that nuts have a lot of oil in them. Therefore, when they’re blended up, instead of becoming a dry, crumb-like substance, they become a thick, wet paste.
Why use the KitchenAid Grinder?
There are a lot of blenders and grinders out there which wouldn’t be able to do this, as the motors or the blades aren’t strong enough. However, the KitchenAid grinder attachment can easily chew through whatever you use it for, allowing you to make delicious peanut butter in no time at all.

Recipe: Homemade Peanut Butter, Using The KitchenAid Grinder Attachment
Ingredients:
- 400 g unsalted roasted peanuts (or other nuts.)
- 2 tbsp rapeseed oil (or another neutral oil.)
Optional:
- Salt: add a small pinch to act a flavor enhancer in your final recipe.
- Honey (agave nectar, or maple syrup: these can be used to sweeten your nut butter if you don’t get the flavor that you were hoping for.)
Method:
- Add the nuts and the oil to the top chamber of the KitchenAid grinder attachment. Add the nuts first, and then cover with the oil to achieve an even coating. Before turning on the grinder, place a bowl underneath to catch the peanut butter.
- Turn the grinder on, starting at the lowest speed at first. If the nuts are lying in the wrong position, you don’t want to immediately leap to the highest setting and spray nuts all over your kitchen. Gradually increase the speed until you get to a stable point.
- As the nuts get drawn down into the grinder, use the supplied tamper or a similar implement to push them down. Never use your hands or fingers for this purpose, as you may hurt yourself on the inner workings of the grinder.
- Eventually, all of the nuts and oil should’ve been drawn down through the grinder and out into the waiting bowl. Sample the peanut butter for consistency, and if you’re unhappy and believe it is too chunky, simply run it through again.
- When you’re happy with the texture, taste the peanut butter and add sweeteners or salt if needed. If you feel your peanut butter is a little too thick, perhaps choose maple syrup to add as a sweetener. As it is particularly thin, it will make your peanut butter thinner too. Your peanut butter will store in an airtight container in the fridge for up to three weeks.
Peanut butter is one of the great comfort foods of the modern world, whether you’re dunking something into it or spreading it on a sandwich. Give this recipe a go today, and have a PB&J for us!
Have you guys ever encountered those store bought peanut better and they say “homemade,” quite the contrary it isn’t homemade anymore if you’ve done it for production and sold in the grocery! Now this post though, this is what we mean by homemade. I love the close-up picture and how you can feel the texture just by staring at the photo. I hope when I try this out it turns out as I imagined it to be.