Bask in the enchanting allure of spring as we delve into the whimsical world of crafting magic with decoupage Easter egg delights. Picture this – a burst of vibrant colors, intricate designs, and a touch of artistic finesse transforming ordinary eggs into exquisite pieces of art that capture the essence of the season. In a time-honored tradition that blends creativity with celebration, decoupage Easter eggs stand out as both a delightful craft project and a symbol of joyous festivities. As we embark on this creative journey, we invite you to discover the artistry and charm behind the craft of decoupage Easter eggs. From selecting the perfect eggs to mastering the delicate technique of decoupage, each step unveils a world of possibilities where imagination knows no bounds. Join us as we explore the fusion of tradition and innovation, breathing new life into age-old practices to create stunning Easter egg masterpieces that are sure to dazzle and delight. Let’s embrace the spirit of the season and infuse our celebrations with a touch of handmade elegance, one decoupage Easter egg at a time.

 Selecting the Perfect Eggs for Decoupage
When it comes to decoupage Easter eggs, selecting the right eggs is crucial. While you can use any type of egg for this craft, blown-out eggs or wooden eggs are often preferred due to their durability and ease of handling. Blown-out eggs are created by removing the contents of a raw egg through a small hole, leaving behind just the shell. Wooden eggs, on the other hand, provide a solid base for your decoupage designs.
If you choose to work with blown-out eggs, start by carefully piercing a small hole at both ends of the egg using a pin or needle. Gently widen one of the holes and blow into it to force out the contents of the egg. Rinse the empty shell with water and let it dry completely before proceeding with your decoupage project.
For those who prefer wooden eggs, they can be easily found at craft stores or online. These eggs come in various sizes and are perfect for long-lasting Easter decorations that can be reused year after year.
Exploring Inspirational Designs and Themes
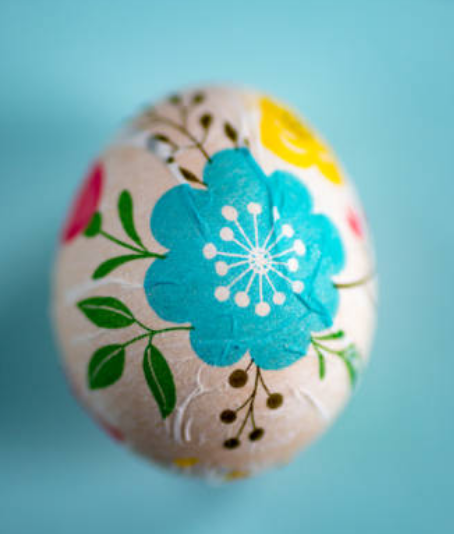
The beauty of decoupage Easter eggs lies in their versatility. From traditional motifs to modern designs, there is an endless array of inspirations to explore. Take some time to gather ideas from books, magazines, or online sources that showcase different decoupage styles and themes.
Consider incorporating elements that resonate with your personal style or reflect the overall aesthetic you want to achieve. Whether it’s delicate floral patterns, whimsical illustrations, or intricate geometric shapes – let your imagination run wild as you curate a collection of design inspirations that will guide your creative journey.
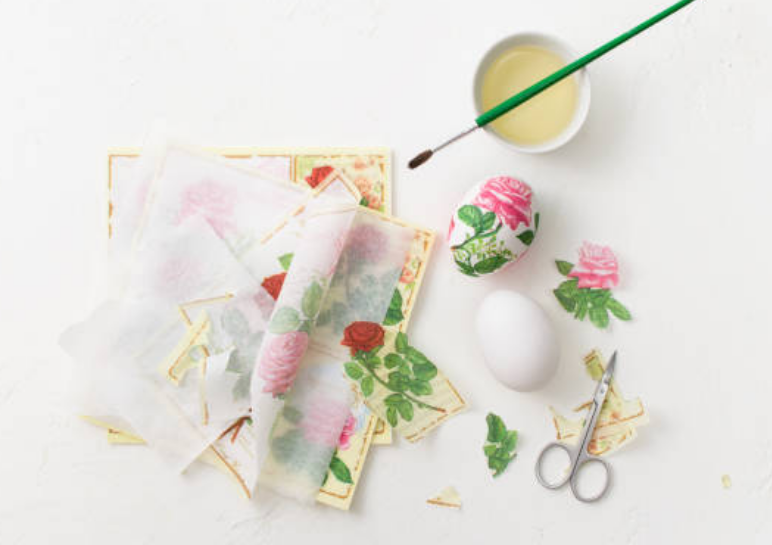
Gathering Essential Decoupage Supplies
To bring your decoupage Easter egg visions to life, you’ll need a few essential supplies. Here’s a list of items to have on hand:
- Decoupage glue or Mod Podge
- Paintbrushes in various sizes
- Napkins, tissue paper, or decorative paper for decoupage
- Scissors or craft knife
- Ribbon, lace, or other embellishments (optional)
Make sure to gather all the necessary supplies before starting your project. This will ensure a smooth and uninterrupted creative process.
Preparing the Eggs for Decoupage
Before diving into the world of decoupage, it’s important to prepare your eggs properly. If you’re working with blown-out eggs, make sure they are clean and dry. You can gently sand the surface of the eggshell to create a slightly rough texture that will help the glue adhere better.
If you’ve opted for wooden eggs, give them a light sanding as well to remove any rough edges or imperfections. Wipe away any dust with a soft cloth before moving on to the next step.
Mastering the Art of Decoupage Technique
The heart of decoupage lies in its technique – layering delicate pieces of paper onto a surface using adhesive. To achieve a seamless and professional-looking result, follow these steps:
- Tear or cut your chosen decorative paper into small pieces or shapes.
- Apply a thin layer of decoupage glue onto the surface of your egg using a paintbrush.
- Carefully place one piece of paper onto the glued area and smooth it out gently with your fingers or a clean brush.
- Continue adding more pieces, overlapping them slightly to create depth and dimension.
- Ensure that each layer of paper is fully coated with decoupage glue to seal it in place.
Take your time with this process, allowing each layer to dry before adding the next. This will prevent the paper from wrinkling or bubbling. Remember, patience and precision are key to achieving a flawless decoupage finish.
 Adding Dimension with Layering and Embellishments
To elevate your decoupage Easter eggs from ordinary to extraordinary, consider adding dimension through layering and embellishments. Experiment with different textures by combining various types of decorative paper – from delicate tissue paper to sturdy napkins with intricate patterns.
You can also incorporate additional elements such as ribbons, lace, or small charms to enhance the overall design. These embellishments can be attached using decoupage glue or a hot glue gun for added security.
Finishing Touches: Sealing and Protecting Your Easter Egg Creations
Once you’re satisfied with your decoupage design, it’s time to seal and protect your Easter egg creations. Apply a final coat of decoupage glue over the entire surface of the egg, ensuring that all edges are well-sealed.
This protective layer will not only give your eggs a glossy finish but also safeguard them against moisture and wear. Allow the eggs to dry completely before moving on to the next step – displaying and showcasing your handmade masterpieces.
Displaying and Showcasing Your Decoupage Easter Egg Delights
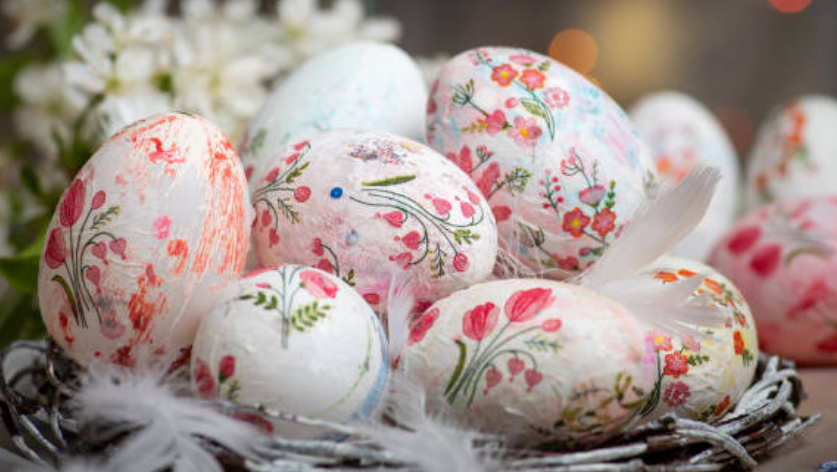
Your beautiful decoupage Easter eggs deserve a special place in your home during the spring season. Consider creating an eye-catching centerpiece by arranging them in a decorative basket or nest. You can also display them on a mantel, side table, or as part of a festive Easter vignette.
Get creative with your presentation and let your decoupage Easter eggs take center stage. Their vibrant colors and intricate designs will undoubtedly become a conversation starter and a visual delight for all who behold them.
Capturing Memories: Photographing Your Handmade Masterpieces
Before you share your decoupage Easter egg creations with friends and family, take the time to capture their beauty through photography. Set up a well-lit area where you can showcase the details of each egg.
Experiment with different angles, close-ups, and compositions to truly capture the essence of your handmade masterpieces. These photographs will serve as cherished memories of your creative journey and can be shared on social media or printed out as keepsakes.
Embracing the Joy of Handmade Easter Egg Decorations
The art of decoupage allows us to infuse our celebrations with a touch of handmade elegance. By transforming ordinary eggs into extraordinary works of art, we create lasting memories and embrace the joy that comes from crafting something beautiful with our own hands.
This spring season, let’s embark on this enchanting journey together – exploring new techniques, discovering inspiring designs, and crafting magic with decoupage Easter egg delights. Whether you’re an experienced crafter or just starting out, there’s no better time to unleash your creativity and celebrate the season in style.