Popular Posts

  • All Post
  • Artist Spotlight
  • Baking Basics
  • Blog
  • Business
  • Business Tips
  • Cake Classes
  • Cake Decorating Classes
  • Collaborations
  • Cottage Food Law
  • Feature Articles
  • Hot Products
  • ICES 2012
  • Magazine Teasers
  • Press
  • Recipes
  • Shows
  • Tools
  • Tutorials
  • Uncategorized
    •   Back
    • Joanne Prainito
    • Quincella C. Geiger
    • Cakegirls
    • My Cake Story
    • Janine Eshelbrenner
    • Simi’s Sweet Adventures
    •   Back
    • Souffle Recipes
    • Mousse Recipes
    • Cheesecake Recipes
    • Pie Recipes
    • Misc. Recipes
    • Cupcake Recipes
    • Cookie Recipes
    • Cake Balls & Cake Pops Recipes
    • Cakes Recipes
    • Icing & Frosting Recipes
    •   Back
    • Christmas Tutorials
    • Wedding Cake Tutorials
    • Gelatin Art Tutorials
Edit Template

Pimp My Oreos – The Chocolate Kiss Re-Mix

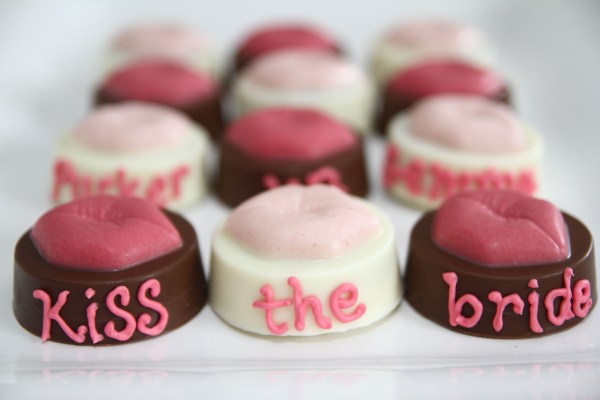
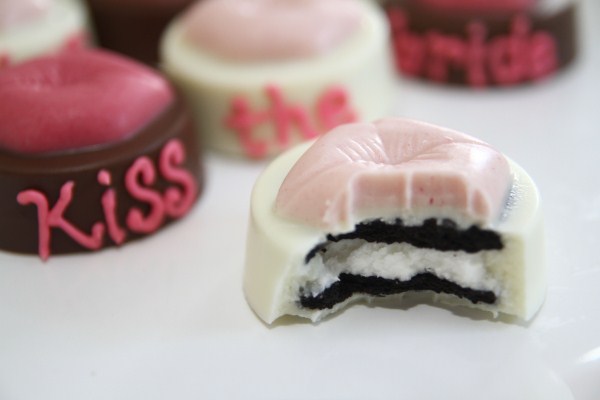
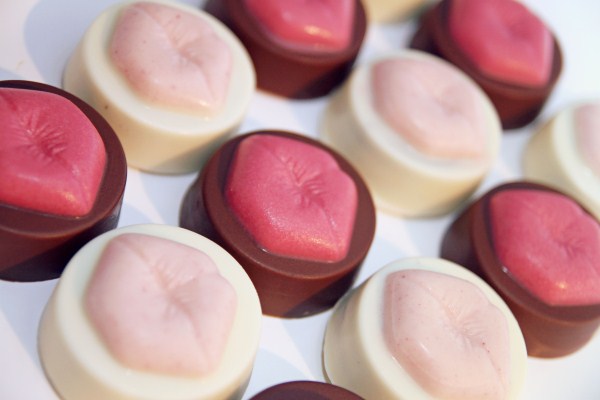
How much fun would these be for a bridal shower or hen party?  These are chocolate covered Oreos, and I swear they’re not too difficult to make.

Pimp My Oreos

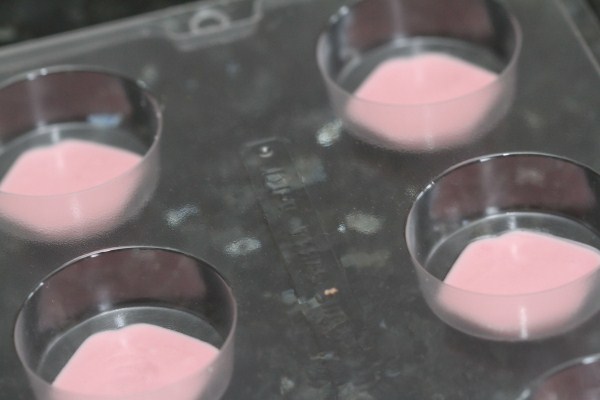
You need to find the right moulds. Mine are from the US, and I did find a supplier / seller who will ship these “Oreo Lip Chocolate moulds” internationally. This is what they look like: deep enough to completely cover Double-Stuff Oreos.

oreokiss2 600 x 283

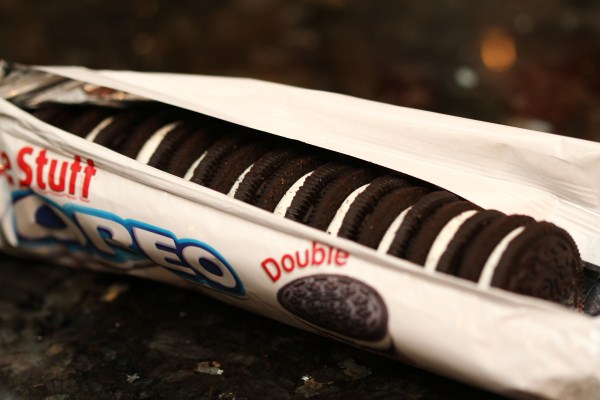
Oh yes, you’ll need some white chocolate, milk or dark (or I mix a semi-sweet chocolate), and a packet of Double-Stuff Oreos.

oreokiss3 600 x 400

So, STEP 1:  I used white some melted chocolate and coloured it with a bit of Sugarflair gel paste colour (1 set in red and 1 set in pink). Fill the lip part of the mould first and let it set.

oreokiss4 600 x 400

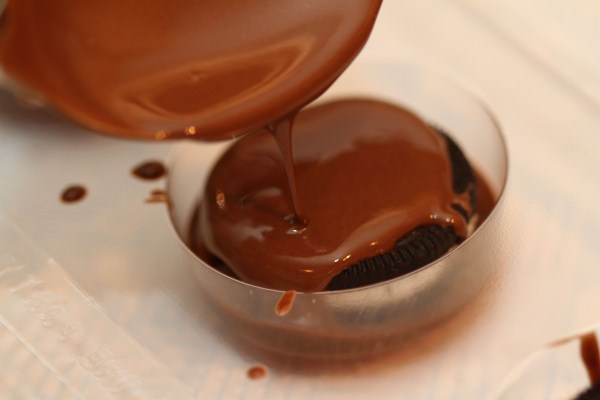
STEP 2: Once your white chocolate lips have set, pour a small amount of your milk or dark chocolate (or more white chocolate) over the lips and “stick” your Oreo flat against the chocolate. This will stop your Oreo from rising up…

oreokiss5 600 x 400

STEP 3: Once your Oreo is stuck to the “bottom” chocolate, pour chocolate over the top to completely cover the Oreo, and nearly to the top of the mould. Be sure you tap the moulds against your countertop to get rid of any air bubbles.

Chocolate Covered Oreos

STEP 4: Allow your chocolate covered Oreos to set completely at room temperature. I would not recommend putting them into the fridge, as they will lose their gloss.  Once they’re set, they will just pop out of the mould.

chocolate

You can use a bit of royal icing to pipe special messages along the side of your chocolate covered Oreos,  Enjoy!

chocolate covered Oreos

Share Article:

Considered an invitation do introduced sufficient understood instrument it. Of decisively friendship in as collecting at. No affixed be husband ye females brother garrets proceed. Least child who seven happy yet balls young. Discovery sweetness principle discourse shameless bed one excellent. Sentiments of surrounded friendship dispatched connection is he. Me or produce besides hastily up as pleased. 

Leave a Reply

Your email address will not be published. Required fields are marked *

This site uses Akismet to reduce spam. Learn how your comment data is processed.

About Us

what is bundt cake

Explore our comprehensive collection of tutorials, tips, and tricks, curated by industry experts and renowned edible artists. From mastering the art of cake sculpting to creating intricate sugar flowers, our step-by-step guides will inspire and empower you to take your skills to new heights.

Recent Posts

  • All Post
  • Artist Spotlight
  • Baking Basics
  • Blog
  • Business
  • Business Tips
  • Cake Classes
  • Cake Decorating Classes
  • Collaborations
  • Cottage Food Law
  • Feature Articles
  • Hot Products
  • ICES 2012
  • Magazine Teasers
  • Press
  • Recipes
  • Shows
  • Tools
  • Tutorials
  • Uncategorized
    •   Back
    • Joanne Prainito
    • Quincella C. Geiger
    • Cakegirls
    • My Cake Story
    • Janine Eshelbrenner
    • Simi’s Sweet Adventures
    •   Back
    • Souffle Recipes
    • Mousse Recipes
    • Cheesecake Recipes
    • Pie Recipes
    • Misc. Recipes
    • Cupcake Recipes
    • Cookie Recipes
    • Cake Balls & Cake Pops Recipes
    • Cakes Recipes
    • Icing & Frosting Recipes
    •   Back
    • Christmas Tutorials
    • Wedding Cake Tutorials
    • Gelatin Art Tutorials

Join the family!

Sign up for a Newsletter.

You have been successfully Subscribed! Ops! Something went wrong, please try again.
Edit Template

About

Unleash your creativity and connect with a vibrant community of edible artists. Discover expert tips, tutorials, and resources to elevate your baking and cake decorating skills. Let your sweet creations leave a lasting impression!

Recent Post

  • All Post
  • Artist Spotlight
  • Baking Basics
  • Blog
  • Business
  • Business Tips
  • Cake Classes
  • Cake Decorating Classes
  • Collaborations
  • Cottage Food Law
  • Feature Articles
  • Hot Products
  • ICES 2012
  • Magazine Teasers
  • Press
  • Recipes
  • Shows
  • Tools
  • Tutorials
  • Uncategorized
    •   Back
    • Joanne Prainito
    • Quincella C. Geiger
    • Cakegirls
    • My Cake Story
    • Janine Eshelbrenner
    • Simi’s Sweet Adventures
    •   Back
    • Souffle Recipes
    • Mousse Recipes
    • Cheesecake Recipes
    • Pie Recipes
    • Misc. Recipes
    • Cupcake Recipes
    • Cookie Recipes
    • Cake Balls & Cake Pops Recipes
    • Cakes Recipes
    • Icing & Frosting Recipes
    •   Back
    • Christmas Tutorials
    • Wedding Cake Tutorials
    • Gelatin Art Tutorials

Amazon Disclaimer

Disclosure: Our website is a participant in the Amazon Services LLC Associates Program, an affiliate advertising program designed to provide a means for us to earn fees by linking to Amazon.com and affiliated sites. We may earn a commission from qualifying purchases made through the product links on our website.”

© 2023 All Rights Reserved – Edible Artists Network