
Are you ready to embark on a delectable journey into the world of chocolate mastery? Brace yourself as we delve into the intricate and fascinating process of tempering chocolate in this comprehensive beginner’s guide. Just imagine the sheer delight of creating your own glossy, perfectly tempered chocolate treats that snap with each bite, a skill that will elevate your confectionery creations to a whole new level. In this blog post, we will unravel the mysteries of tempering chocolate, demystifying the seemingly complex technique into easy-to-follow steps that will empower you to become a chocolate tempering maestro. From understanding the science behind tempering to mastering the art of achieving that coveted smooth and shiny finish, this guide is your key to unlocking the secrets of this essential culinary skill. So, roll up your sleeves, grab your favorite chocolate bars, and get ready to elevate your dessert game to a whole new level. Let’s dive in and discover the magic of how to temper chocolate like a pro!

The Science Behind Tempering Chocolate
Before we dive into the process of tempering chocolate, it’s important to understand the science behind it. Chocolate is made up of cocoa solids, cocoa butter, and sugar. When chocolate is melted, the cocoa butter crystals become unstable and can form different types of crystals as it cools down. The goal of tempering is to encourage the formation of stable cocoa butter crystals, specifically Type V crystals, which give chocolate its desirable characteristics – a glossy appearance, a smooth texture, and a satisfying snap when broken.
Tempering involves carefully controlling the temperature at which chocolate is melted and cooled. By doing so, we can guide the cocoa butter to form stable crystals and prevent the formation of undesirable ones. This process ensures that our chocolate sets properly and has that signature shine.
Importance of Tempering in Chocolate Making
Tempering is an essential step in chocolate making for several reasons. Firstly, tempered chocolate has a smooth texture that melts evenly in your mouth. It creates a pleasant sensory experience for anyone indulging in your confections.
In addition to texture, tempered chocolate also has an appealing appearance. The glossy finish makes it visually enticing and adds a professional touch to your creations. Whether you’re making molded chocolates or dipping strawberries into velvety goodness, tempered chocolate elevates the overall aesthetic appeal.
Furthermore, tempering also affects the shelf life of your chocolates. Properly tempered chocolates have a longer shelf life compared to untempered ones because they are less prone to developing bloom – those unattractive white streaks or spots on the surface caused by fat or sugar crystallization.
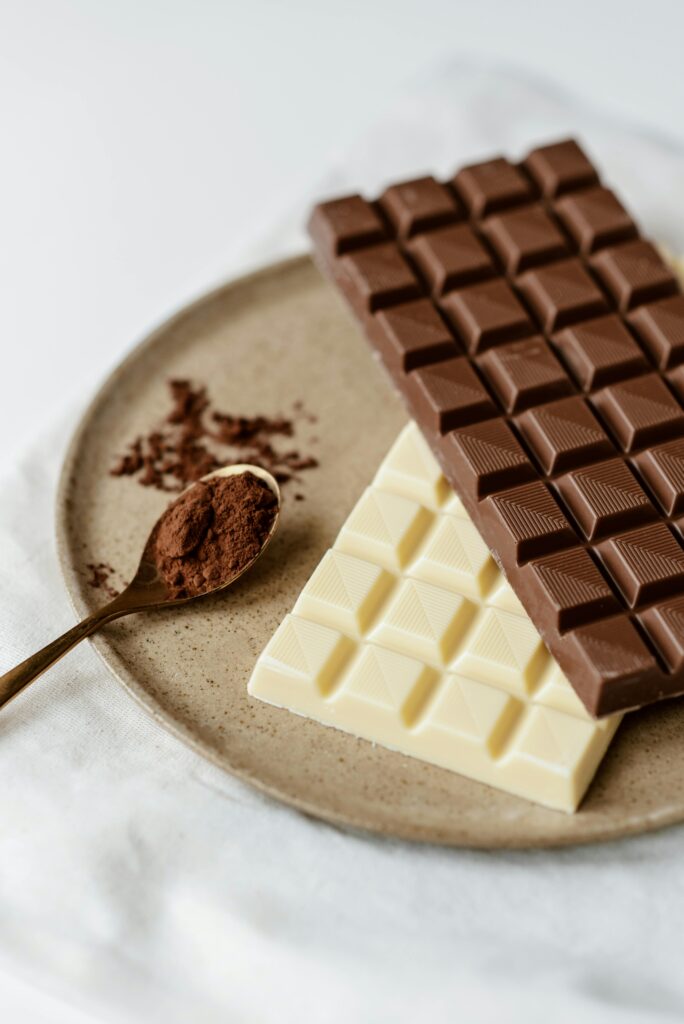 Types of Chocolate Suitable for Tempering

Not all types of chocolate are suitable for tempering. The ideal choice is couverture chocolate, which contains a higher percentage of cocoa butter. Couverture chocolate is known for its superior quality and fluidity, making it easier to work with during the tempering process.
Semi-sweet and dark chocolates are commonly used for tempering due to their higher cocoa content. Milk chocolate, on the other hand, contains less cocoa solids and more milk solids, which can make it more challenging to temper. However, with proper technique and practice, you can still achieve good results with milk chocolate.
Tools and Equipment Needed for Tempering
Before we begin the tempering process, let’s gather the necessary tools and equipment:
- A heatproof bowl or double boiler
- A spatula or wooden spoon
- A candy thermometer
- A marble or granite slab (optional)
- A plastic scraper or bench scraper (optional)
These tools will help us monitor and control the temperature of the chocolate as we go through the tempering process.
Different Methods of Tempering Chocolate
There are several methods you can use to temper chocolate, but in this guide, we will focus on the seeding method. This method is widely used because it is relatively simple and yields consistent results.
The seeding method involves melting a portion of your chocolate until it reaches a specific temperature called the “working temperature.” Then, you add small pieces of unmelted chocolate (seeds) to cool down the mixture until it reaches the desired temperature for tempered chocolate.
Step-by-Step Guide to Seeding Method
Now that we have our tools ready and understand the basics of tempering chocolate let’s dive into a step-by-step guide to the seeding method:
- Chop your chocolate into small, uniform pieces. This will help it melt more evenly.
- Place about two-thirds of the chocolate in a heatproof bowl or double boiler. Set aside the remaining one-third for seeding.
- Gently melt the chocolate over a double boiler, stirring continuously with a spatula or wooden spoon. Be careful not to let any water come into contact with the chocolate, as it can cause it to seize.
- Monitor the temperature of the chocolate using a candy thermometer. Heat it until it reaches around 45-50°C (113-122°F) for dark chocolate or 40-45°C (104-113°F) for milk or white chocolate.
- Remove the bowl from heat and add small pieces of the reserved unmelted chocolate (seeds). Stir gently until all the seeds have melted and the temperature drops to around 32°C (90°F) for dark chocolate or 30°C (86°F) for milk or white chocolate.
- If there are still unmelted seeds, you can gently warm the mixture over a double boiler for a few seconds at a time while stirring until they dissolve completely.
Congratulations! You have successfully tempered your chocolate using the seeding method. Now you can use it for various confectionery applications.
Troubleshooting Common Tempering Issues
While tempering may seem daunting at first, don’t be discouraged if you encounter some challenges along the way. Here are some common issues and their possible solutions:
- Blooming: If your tempered chocolates develop bloom after they’ve set, it could be due to improper tempering or improper storage. Ensure that you temper the chocolate correctly and store it in a cool, dry place away from direct sunlight.
- Seizing: Seized chocolate has a grainy texture and becomes thick and lumpy. This can happen if water comes into contact with the chocolate or if it is overheated. To salvage seized chocolate, you can try adding a small amount of vegetable oil or cocoa butter and gently heating it until smooth.
- Uneven Temper: If your tempered chocolate doesn’t set properly or has streaks of dullness, it may not have been tempered evenly. Ensure that you stir the chocolate thoroughly during the melting and seeding process to distribute heat evenly.
Tempered Chocolate Applications in Confectionery
Now that you’ve mastered the art of tempering chocolate, let’s explore some exciting applications for your beautifully tempered creations:
- Molded Chocolates: Use silicone molds to create stunning chocolates in various shapes and sizes. Fill them with flavored ganache, caramel, or nuts for delightful surprises.
- Dipped Fruits: Dip strawberries, bananas, or other fruits into your tempered chocolate for an elegant dessert option.
- Chocolate Coating: Coat cookies, pretzels, or nuts with tempered chocolate for a deliciously crunchy treat.
- Garnishes: Create intricate designs by piping tempered chocolate onto parchment paper. Once set, these delicate garnishes can be used to decorate cakes, desserts, or plated dishes.
Tips for Maintaining Tempered Chocolate
To ensure that your tempered chocolate remains in its optimal state:
- Avoid introducing moisture to your tempered chocolate, as it can cause it to seize.
- Store your tempered chocolate in a cool, dry place away from strong odors.
- Avoid sudden temperature changes, as they can cause the chocolate to lose its temper.
By following these tips, you can enjoy the benefits of perfectly tempered chocolate for longer periods.
Conclusion: Becoming a Chocolate Tempering Maestro
Congratulations! You’ve completed your journey into the world of tempering chocolate. Armed with knowledge and practice, you are now equipped to create beautifully tempered chocolates that will impress both friends and family. Remember, mastering the art of tempering takes time and patience, so don’t be discouraged if your first attempts aren’t perfect. With each batch, you’ll refine your technique and develop a deeper understanding of this delightful culinary skill. So go forth, experiment with different flavors and textures, and let your creativity run wild in the realm of chocolate mastery!