
Halloween Wedding Cake Ideas
By Tami Utley
www.sugarartbytami.com
A Halloween wedding cake is a fun project. My favorite time of the year is Halloween and I have many Halloween wedding cake ideas. Here is a more sophisticated take on a Halloween wedding cake for those that want something to fit the season but not too scary.
For Design and Assembly:
- 3 ½” half round cake
- Two 6”x 4” cakes to make a double barrel cake
- 9”x 2” cake
- 12” x 4” cake
- 16” x 1.5” cake
- 6”, 9”, 12”, 16”, cake cardboard circles
- 20” base cake board covered in Black fondant
- Deep Purple, Grape, silver edible dusting powders (The Sugar Art)
- Super Black, Electric Purple Gel food color (Americolor)
- Small and medium round/flat paint brushes
- Small scissors
- Tweezers
- Clear alcohol (vodka or lemon extract)
- Black, purple Fondant
- Gelatin
- Glycerin
- Royal icing
- Calla Lily Cutter
- Silk veiner
- Ball tool (or end of large Cell stick)
- 22 g. paper covered wire
- Gum Paste
- Triumphal Renaissance Lace mold (Crystal Candy)
- Patterned plastic fondant mat (any pattern, shown mat is cut in half for another project, they are normally one piece. From Chef Rubber)
- Rope mold
- Sugar dipper mold lily and leaves (Cake Connection)
- Medium chain mold (Marvelous Molds)
- Left Prime Swirl mold, Right Prime Swirl mold (Marvelous Molds)
- Ornate Rosette mold (Marvelous Molds)
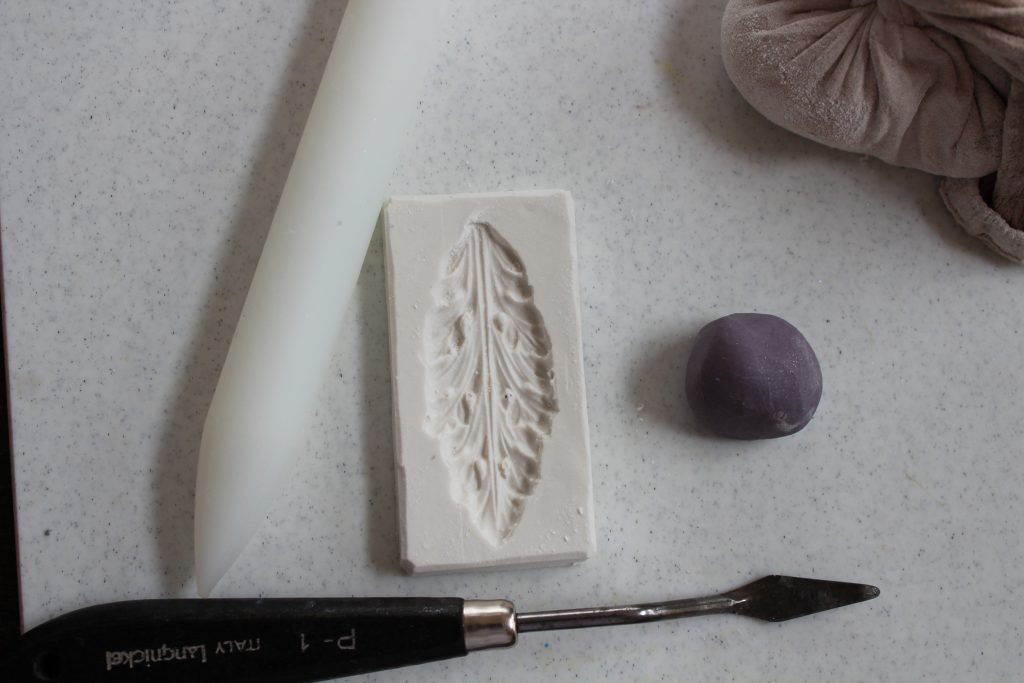
- Acanthus Leaf Mold
- Rope mold (First Impressions)
- Spatula
- Dowels
- Tip 2
- Parchment bags or piping bag of choice
- Royal Icing
- Sugar Glue (Joelle Mahoney’s Chocolaterie Maya), optional
Make sure to bake and chill the cake at least the day before starting this project. Carve 16” cake at an angle to make a bevel. Place 12” cake on top and cover with black fondant. Place two 6” cake on top of each other and cover with black fondant. Cover 3 ½” half round cake with black fondant. Carve 9” cake to make it slightly rounded and cover with purple fondant. Make sure all cakes are on their respective cake boards and doweled for construction.

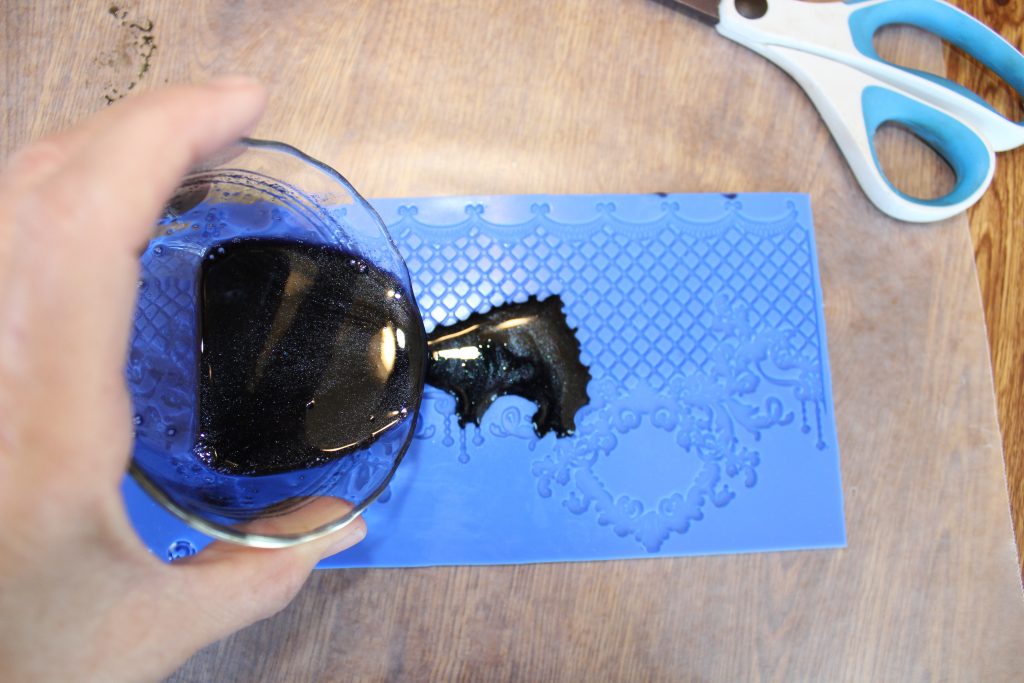
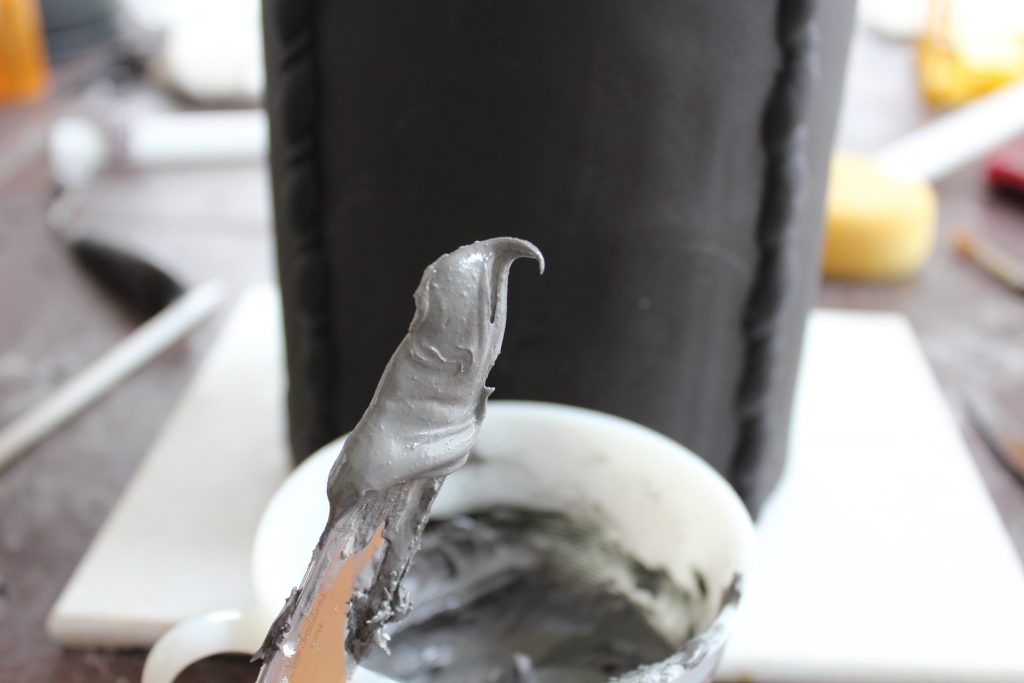
1. Mix 3 tablespoons water with 1 teaspoon glycerin and add a few drops of black food color gel. Sprinkle in gelatin and let sponge for 5 minutes.

2. Heat for 10 seconds in the microwave. Pour over silicone lace mold.
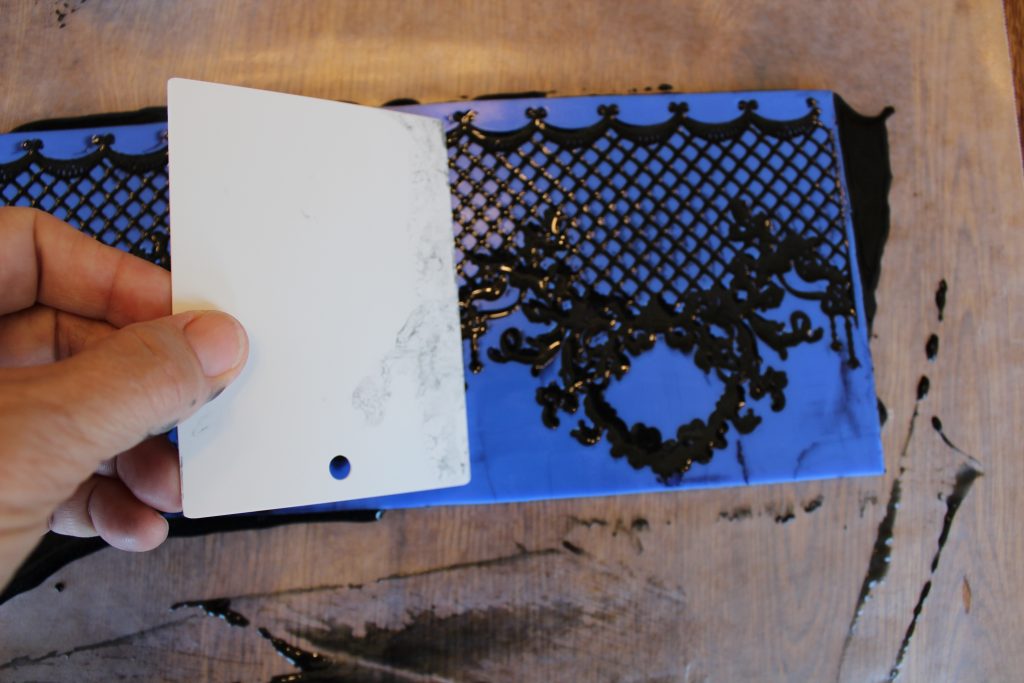
3. Use spatula or flat card to smooth gelatin across the mold, filling it in and removing excess gelatin. Let dry. You are getting close to completing this Halloween wedding cake.
4. Pour remaining gelatin over patterned fondant mat and use a soft floppy paint brush to spread evenly. Let dry.
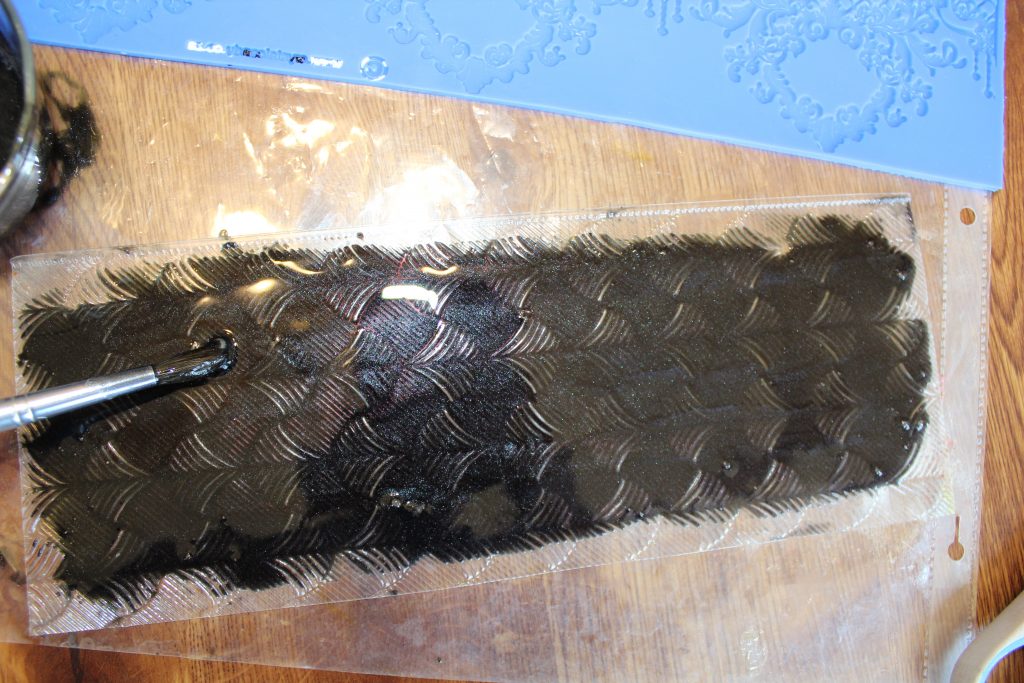
Note: A small fan will help the gelatin dry faster; this will take a few hours to overnight depending on weather and humidity.
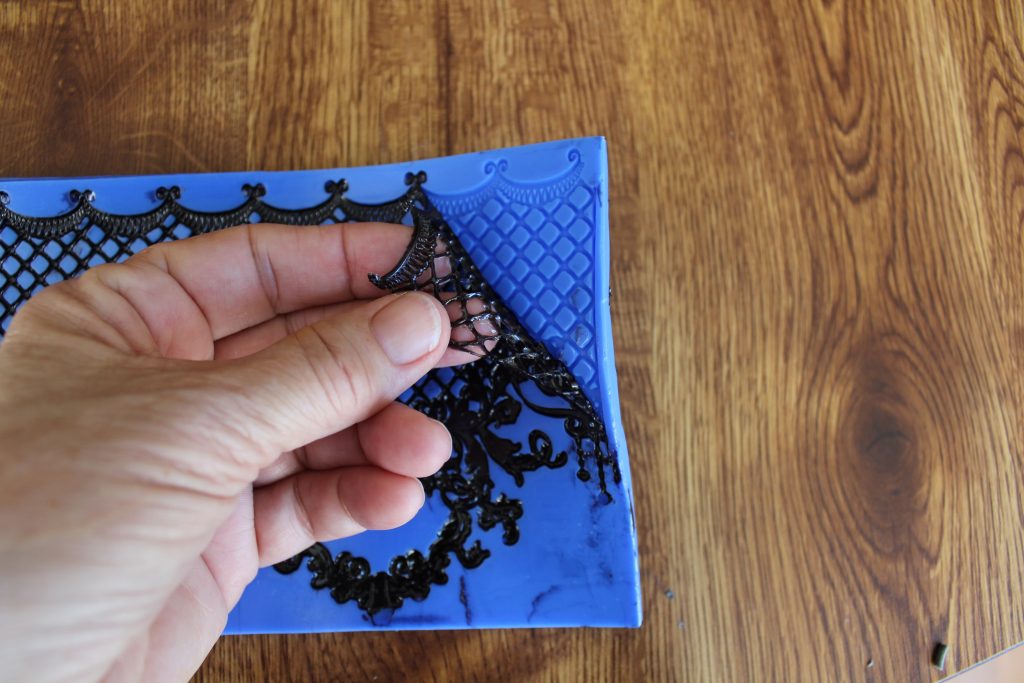
5. Once completely dry, carefully peel off gelatin from lace mold. If the gelatin is still sticky or very stretchy it needs to dry longer. The lace will be flexible and remain that way.
6. Use a toothpick to help release edges of gelatin from patterned lace mat and carefully peel off.

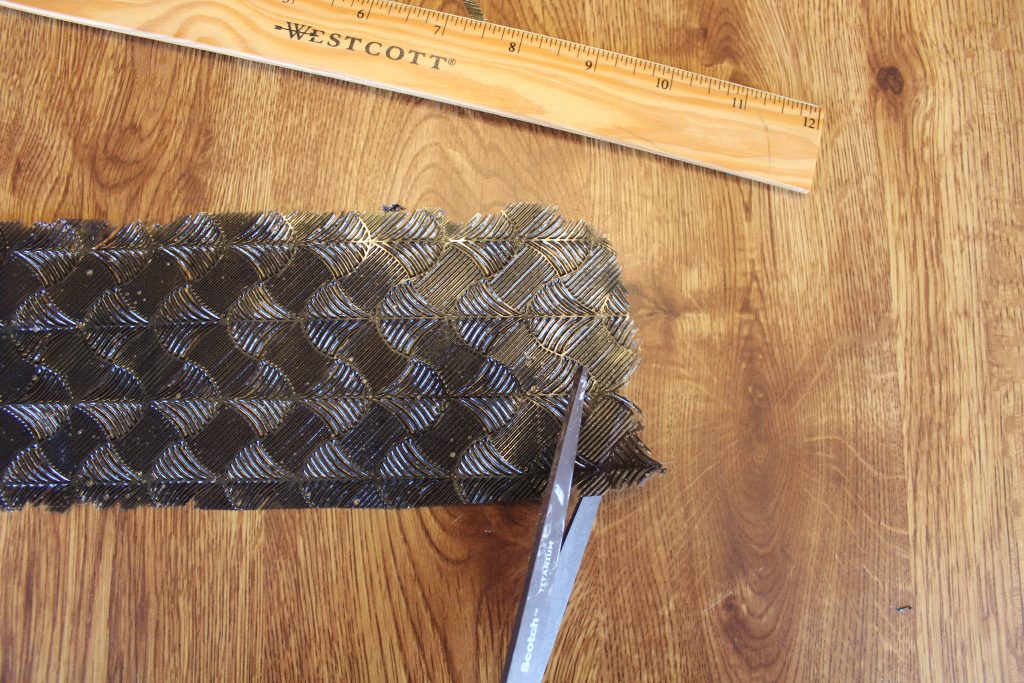
7. The edges will be rough but can easily be cut with scissors. Cut the gelatin from the patterned mat to 3” wide and trim short edges to be straight.
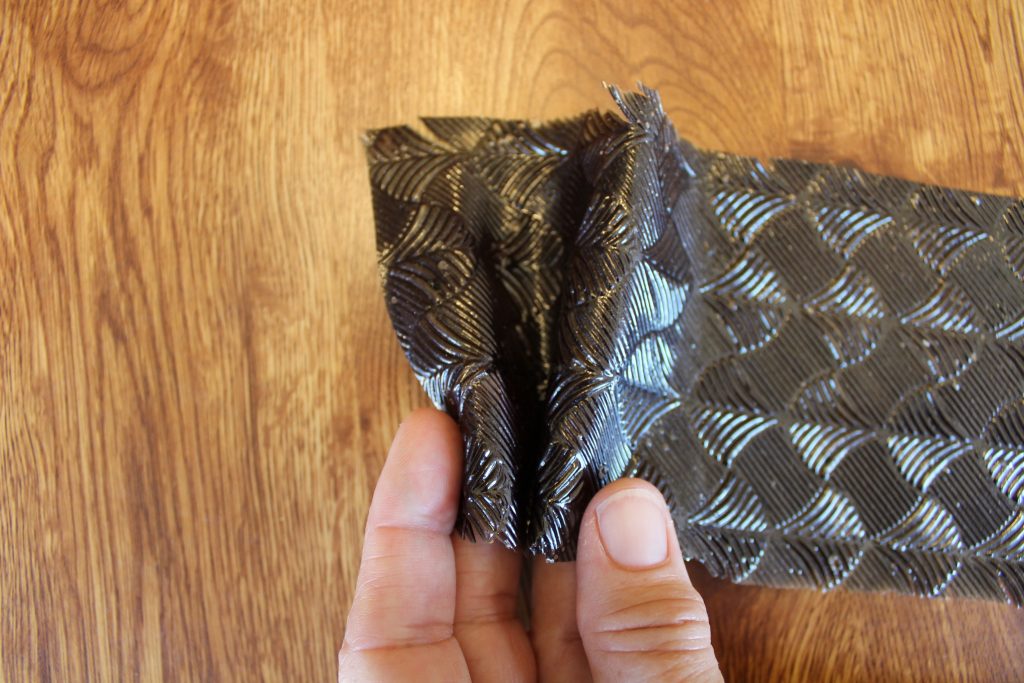
8. Fold the short end back to make a nice starting gather and continue gathering the gelatin along the length.
9. Put a small amount of royal icing where the 16” bevel meets the base of the 12” cake.
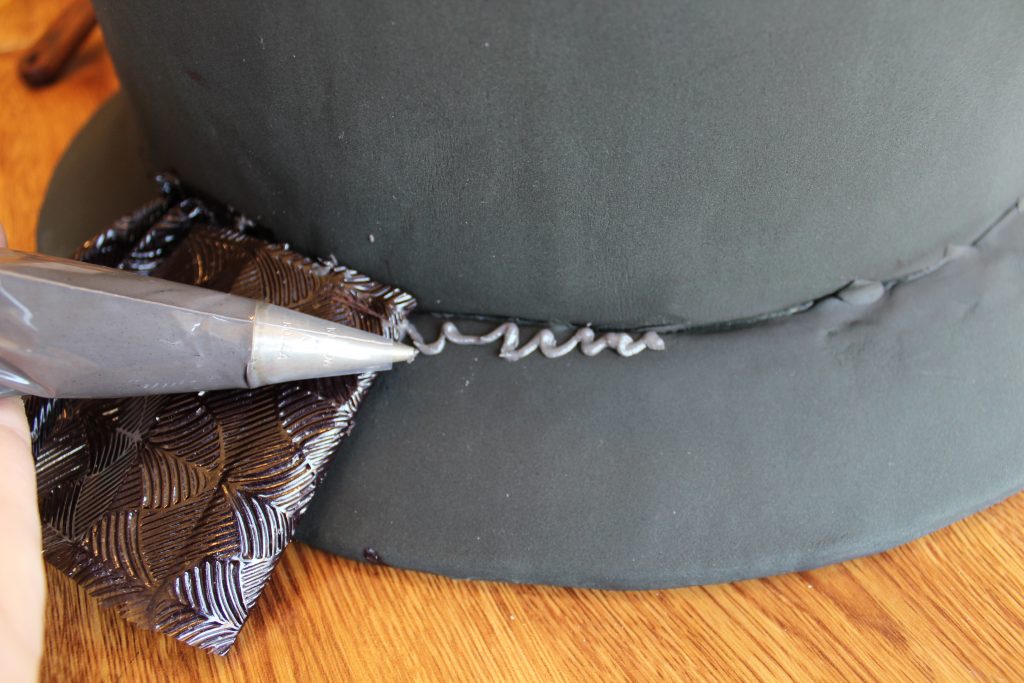
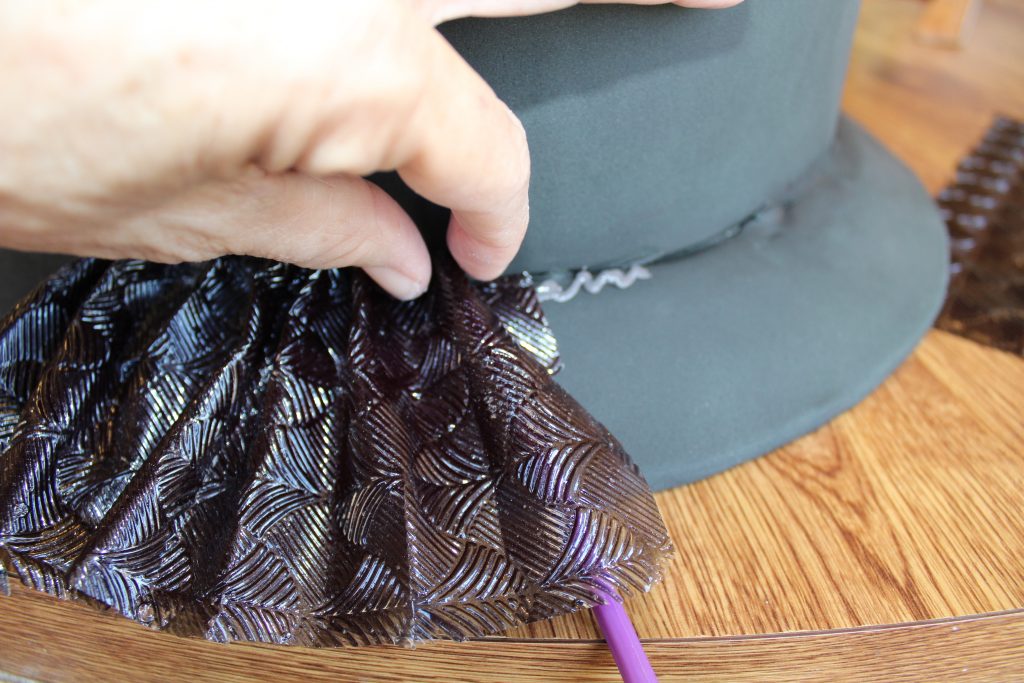
10. Place gelatin ruffle onto the royal icing using the end of a paint brush to help keep the ruffle form.
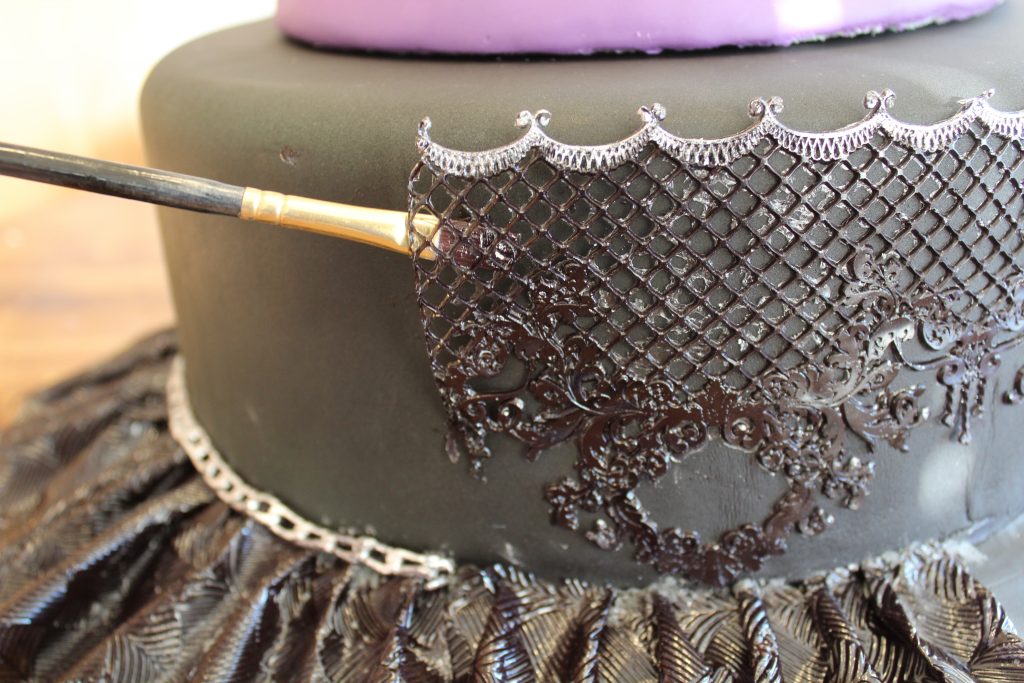
11. Use a little vodka mixed with the silver dust and paint just the top edge of the gelatin lace on your wedding cake idea.

12. With piping gel (or royal icing) and a small brush, paint the back of the lace and attach to the side of the 12” cake. The top edge of the lace will be slightly above the top edge of the cake. Make sure to match the design of the lace when adding the next piece around.
Repeat above steps making several more lace and patterned pieces to go around cake.
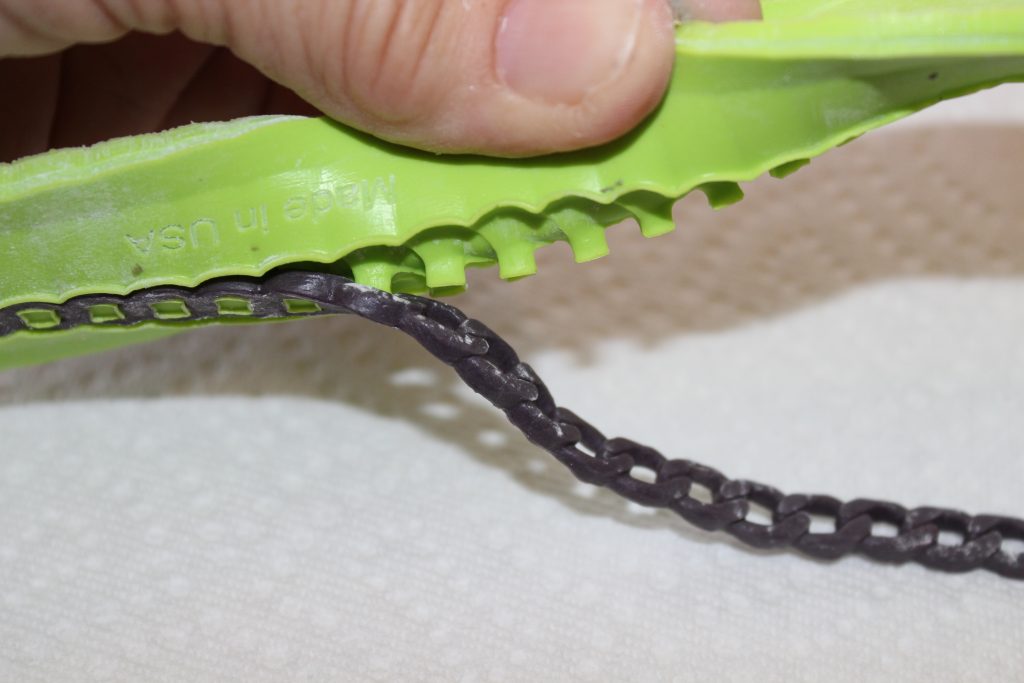
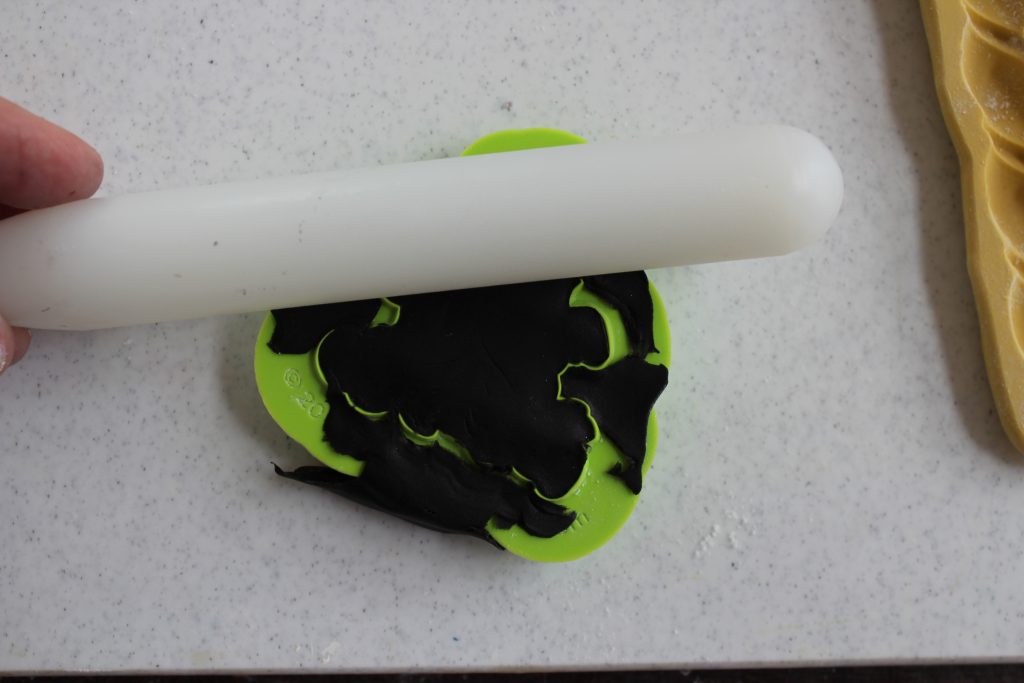
13. Dust the medium chain mold with a little cornstarch and place a little black fondant onto the mold. Roll over with a cel pin or rolling pin and the self-cutting edge will cut the fondant to size.

14. Turn the mold over and pinch slightly. Use a toothpick or fingers to help the chain release from the mold. The fondant will fall easily out of the mold with only a little help.
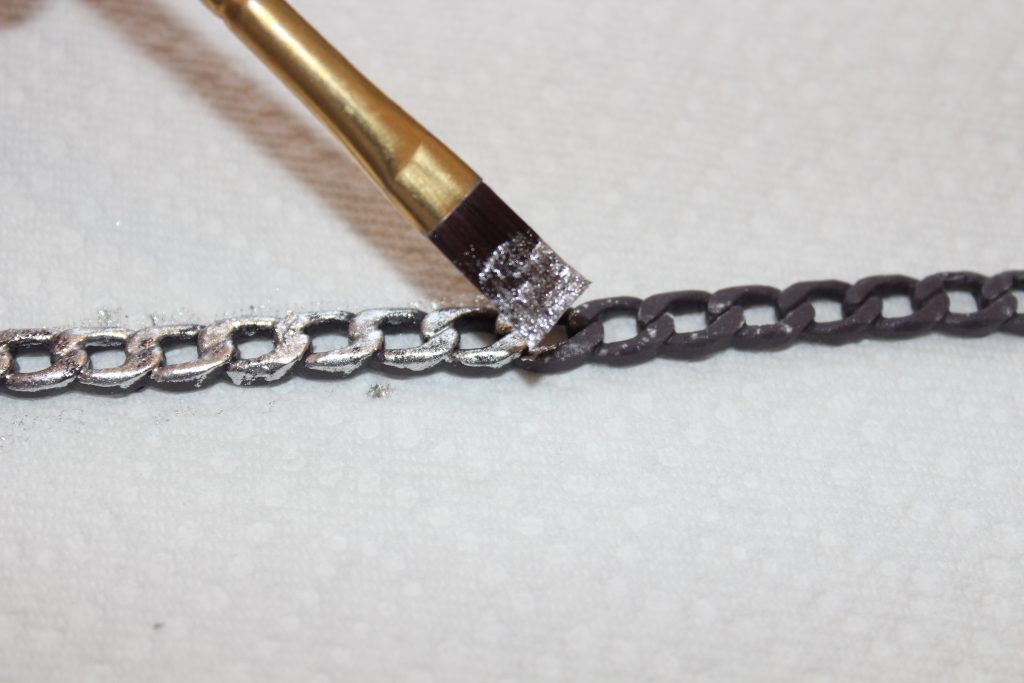
15. Use the vodka and silver dust to paint the chain with a soft brush.
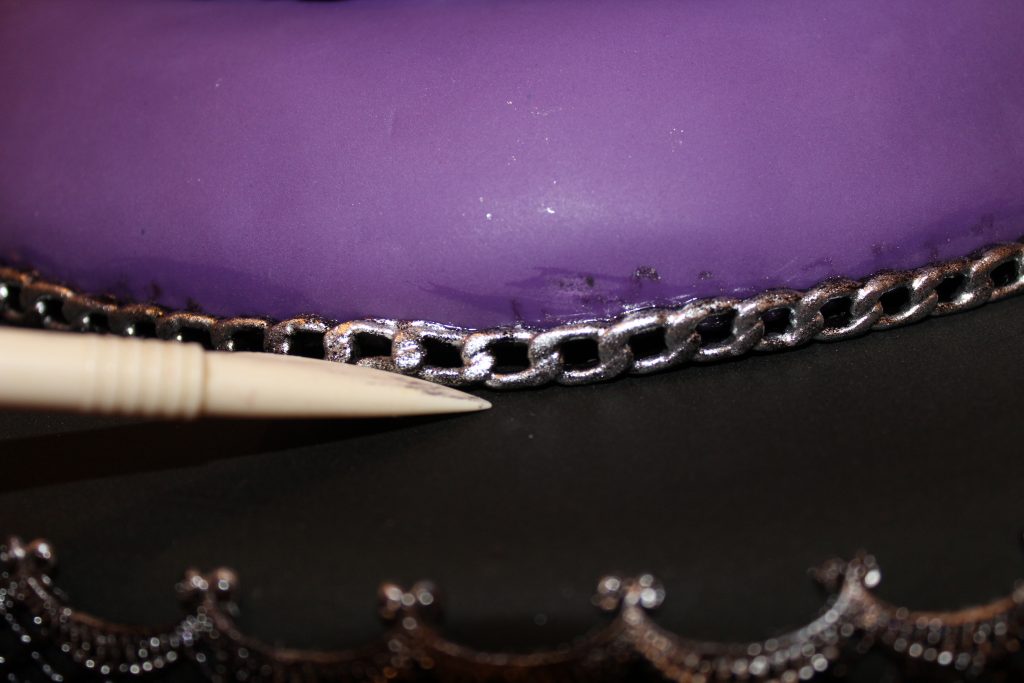
16. Attach the chain to the top of the gelatin ruffle at the base of the 12” cake where it meets the 16” bevel going all the way around. Attach more of the chain at the base of the purple 9” cake where it meets the 12” cake.
17. Use dark grey fondant and roll out a small thick rectangle. Dust the acanthus mold lightly with cornstarch.
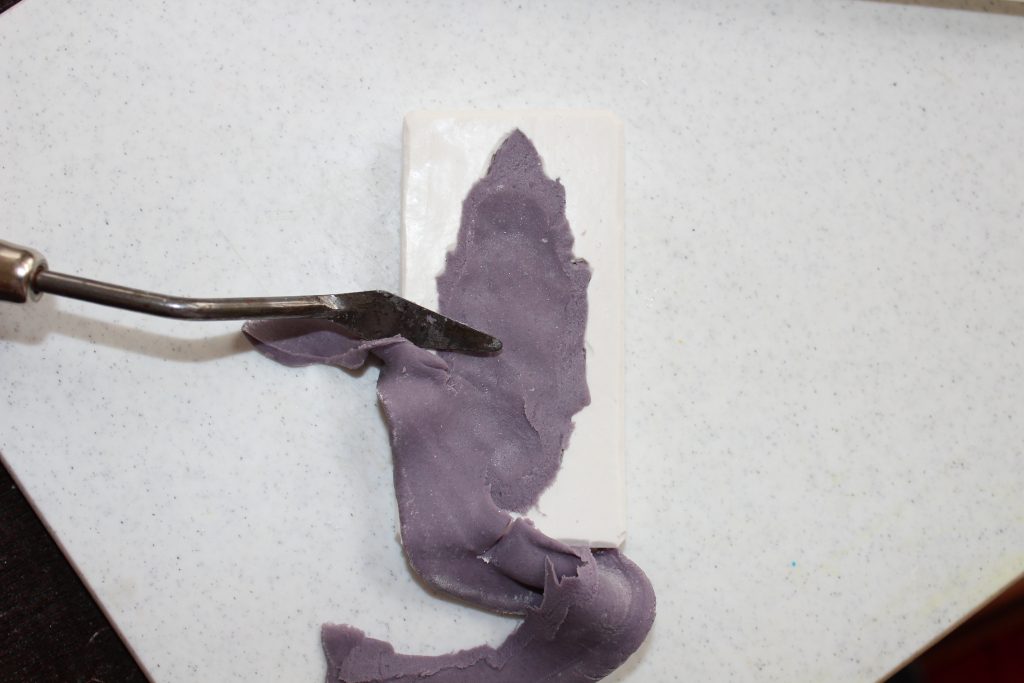
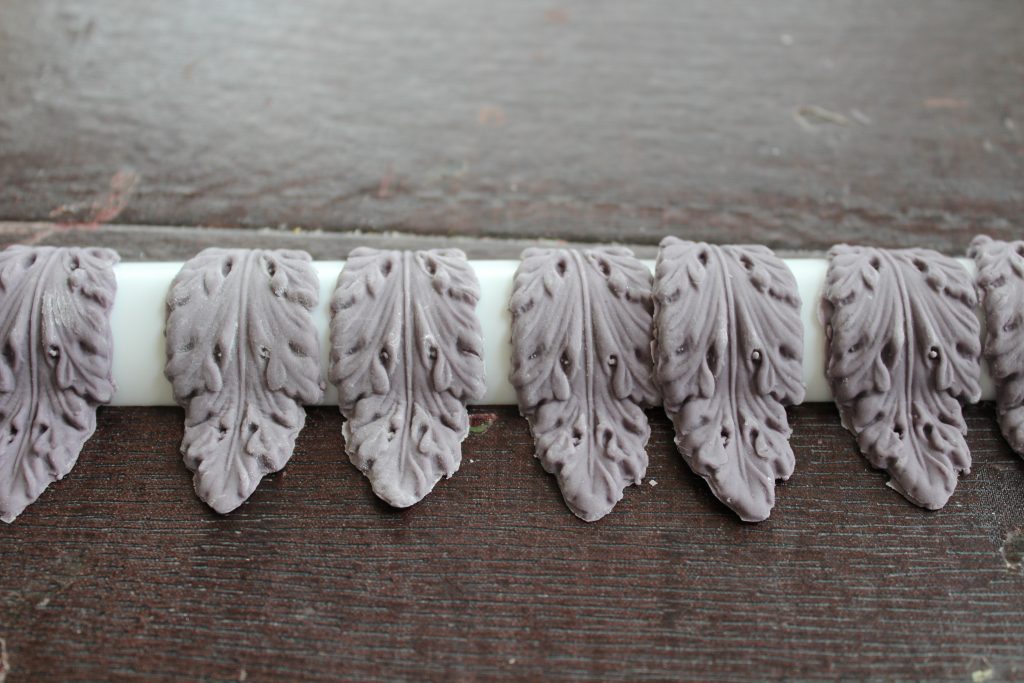
18. Place fondant into the mold and press with foam. With a palette knife or spatula, remove the excess fondant from around the edges of the mold. Make 8 leaves.
19. Place over a small rolling pin or former to create a curved shape and let dry.
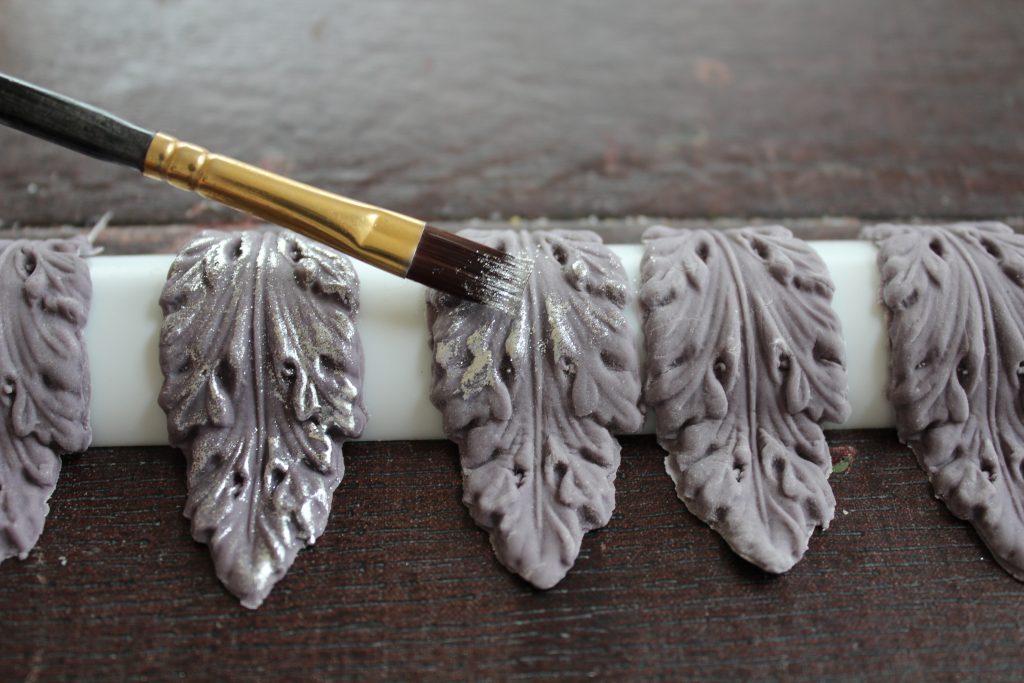
20. With the vodka and silver dust on a flat brush, paint sideways over the raised edges of the leaves. Do not completely cover with silver, the grey fondant should still be seen in the dark crevices of the leaf.
21. Add a few drop of water to stiff royal icing to make a soft peak. Then add a ½ tsp of corn syrup per each cup of royal. This will help when piping with a small tip. Place royal icing into a small bag with a #2 tip.
22. Divide the 9” cake into 8 sections and pipe drop strings from mark to mark.

23. Make 4 lines of strings evenly spaced from top to bottom between each mark.

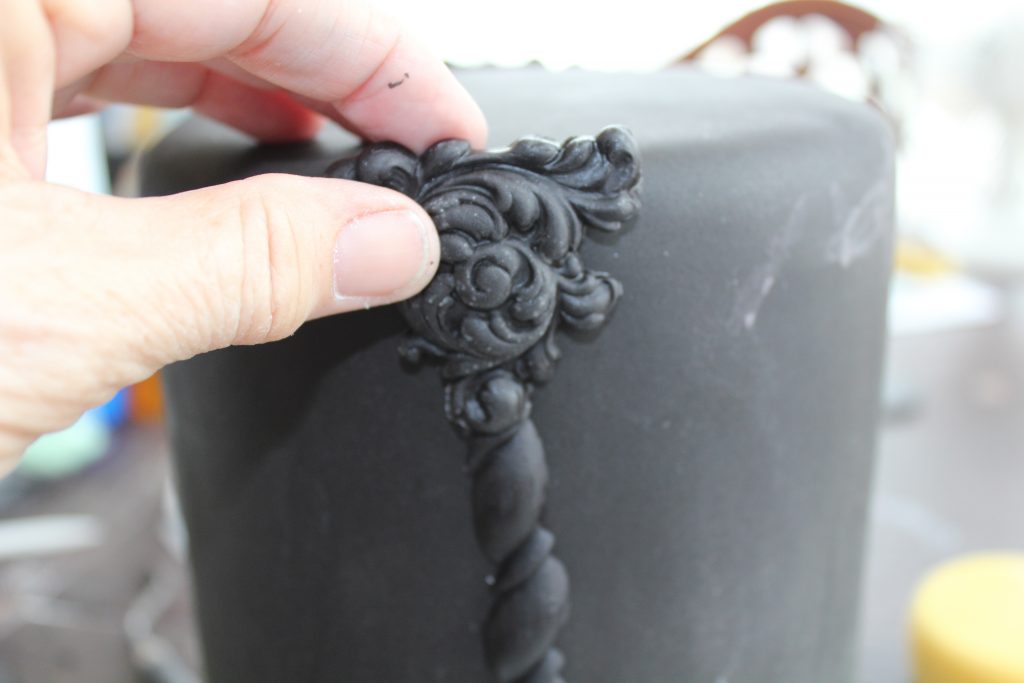
24. Lightly dust the Ornate Rosette and rope mold with cornstarch and roll out black fondant thickly and place into molds.

25. Roll over edge of Ornate Rosette with rolling pin to ‘cut’ the fondant to size. Make four.
Note: Brush off the excess cornstarch with a soft paintbrush so no white is showing on the black fondant.
26. Roll over rope mold with rolling pin and use palette knife or spatula to remove excess fondant from edges. Make four.
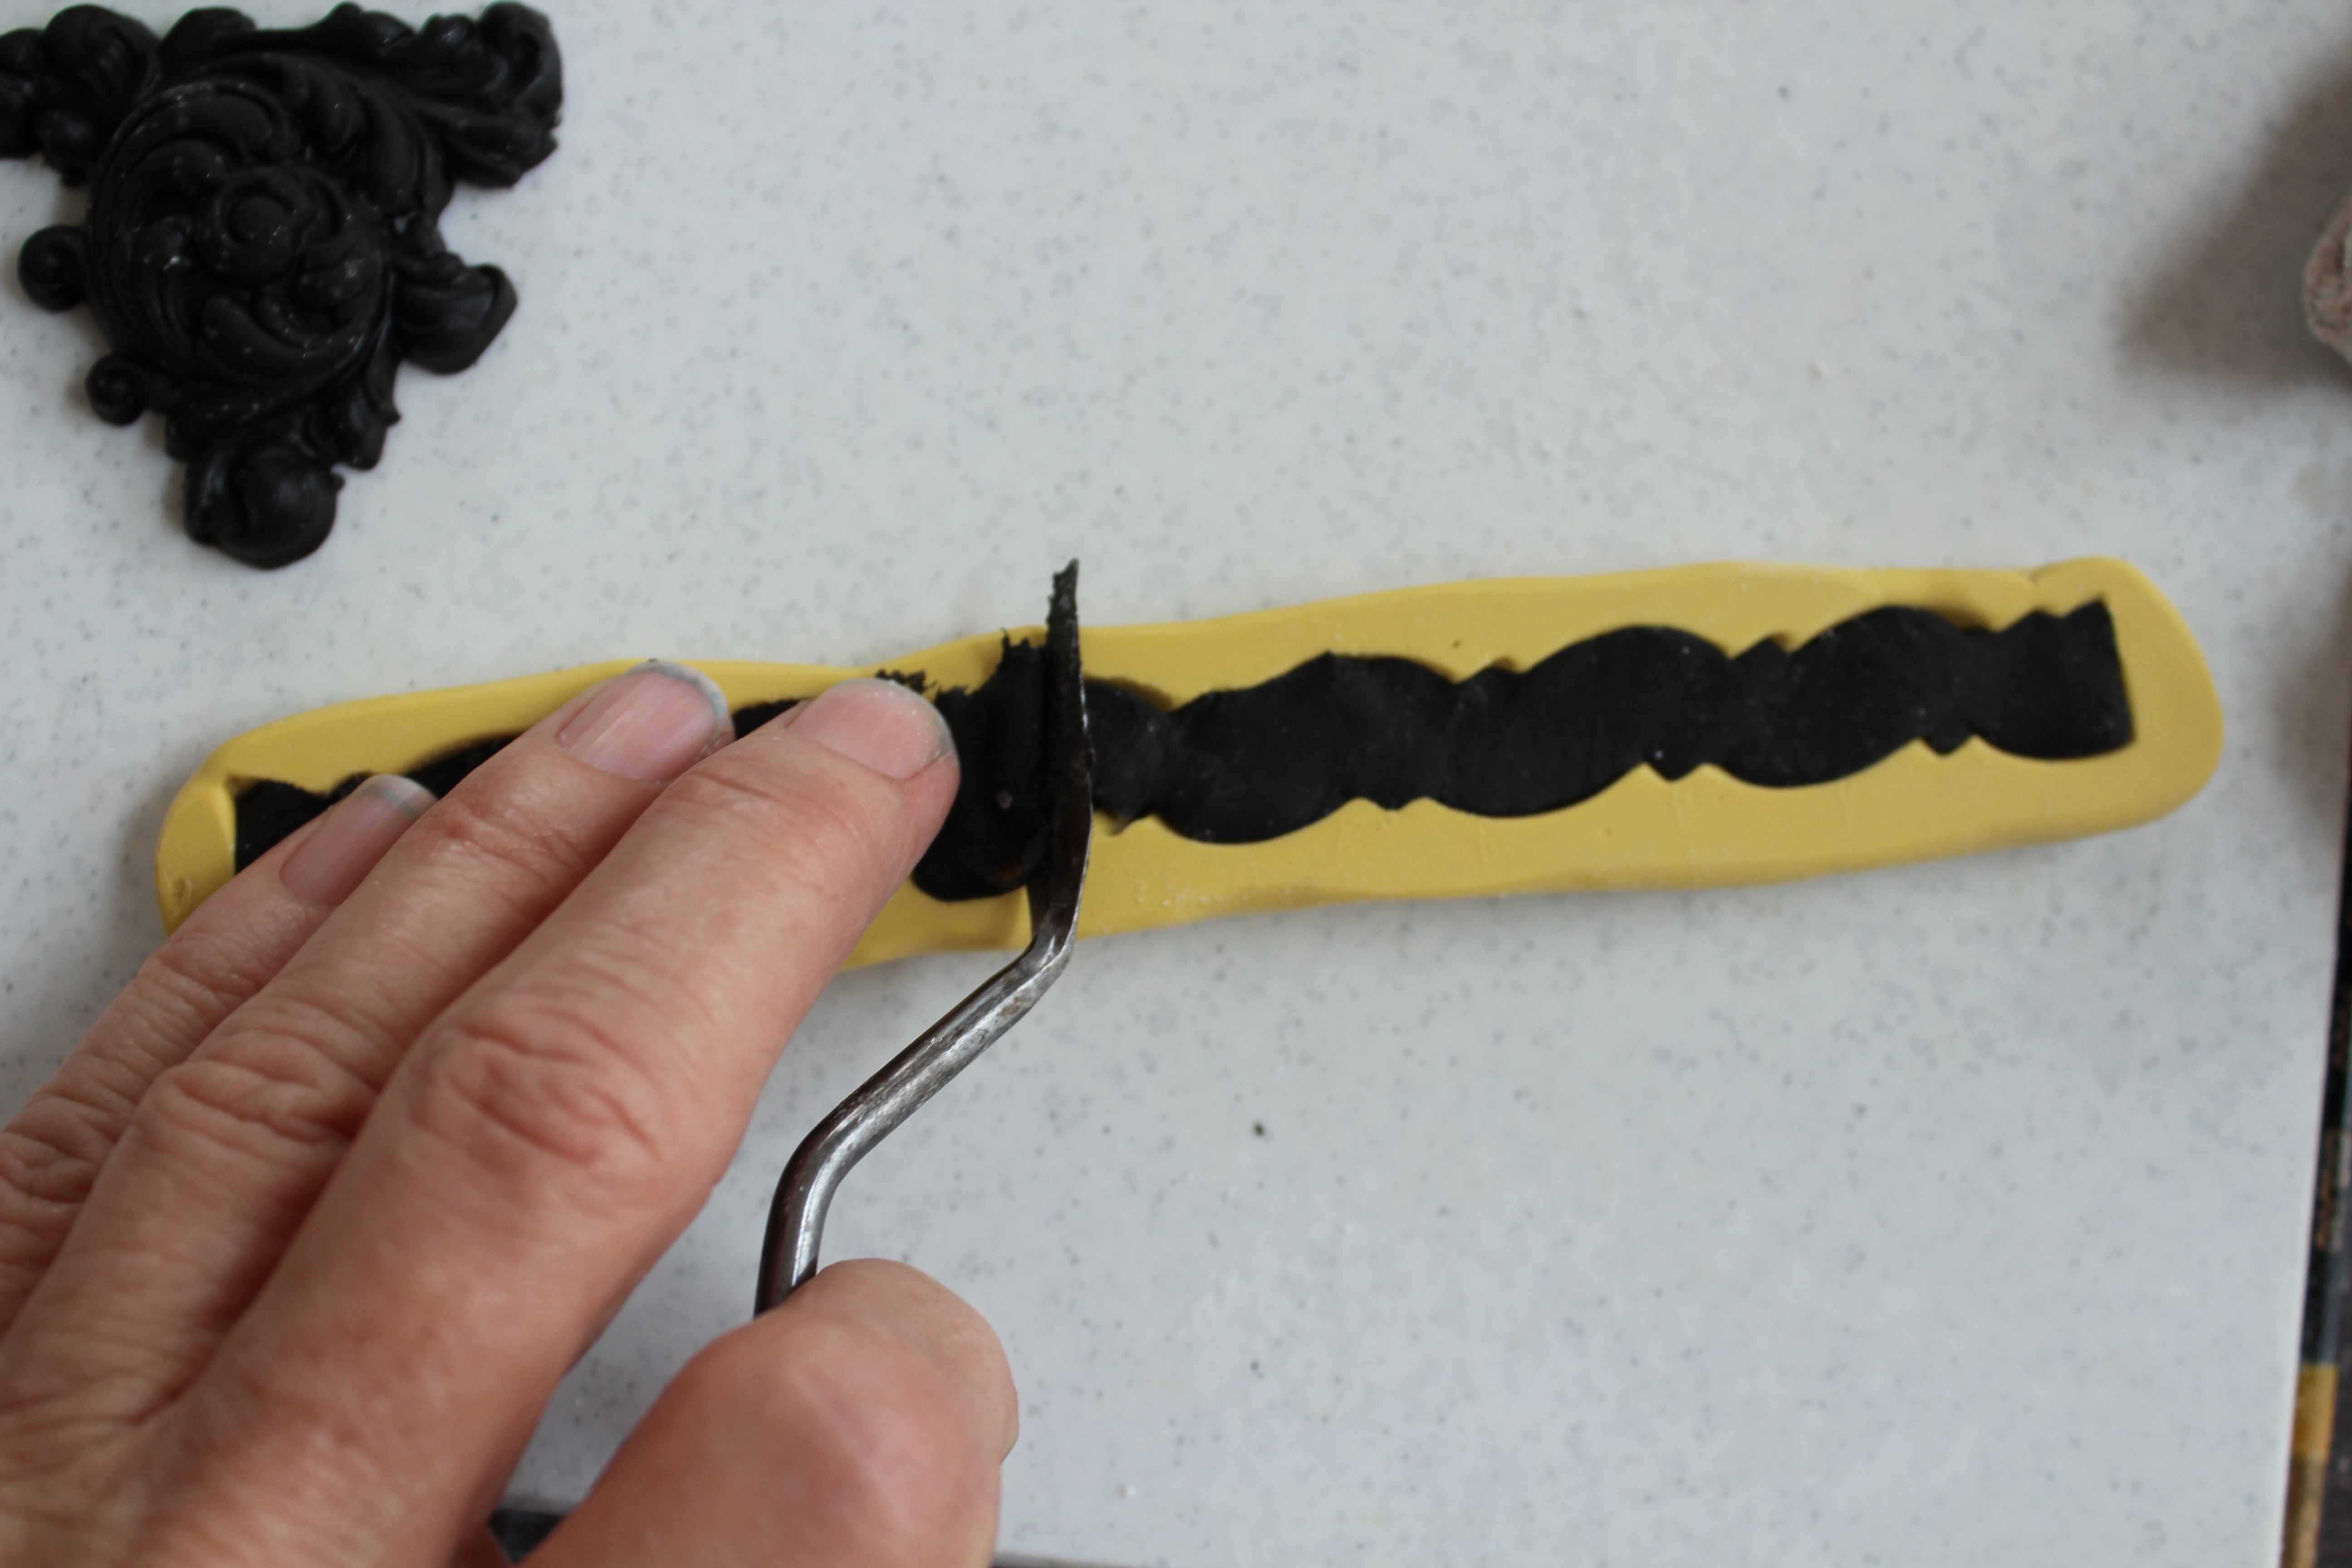
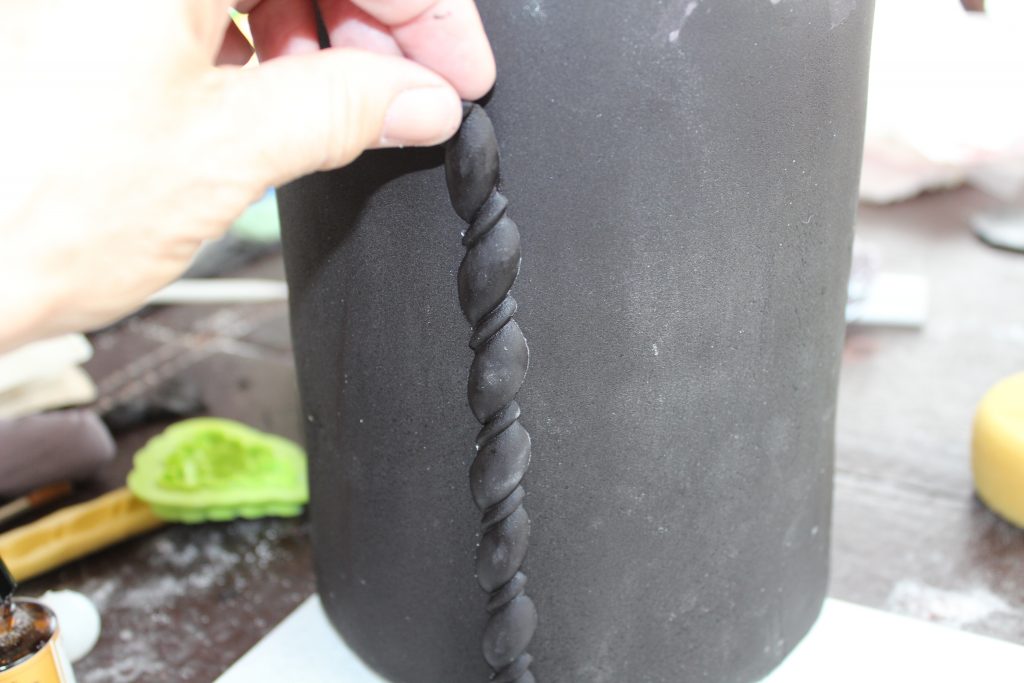
27. Attach rope with water or sugar glue vertically to 6” double barrel cake starting at the bottom. Place all four evenly around.
28. Attach rosettes to top of each rope with the point overlapping the top of the rope and the flat side at the top of the cake.
29. Still using the #2 tip and black royal icing, pipe 5 small dots evenly spaced at an angle from the top center between the rosettes down to the side of the rope.
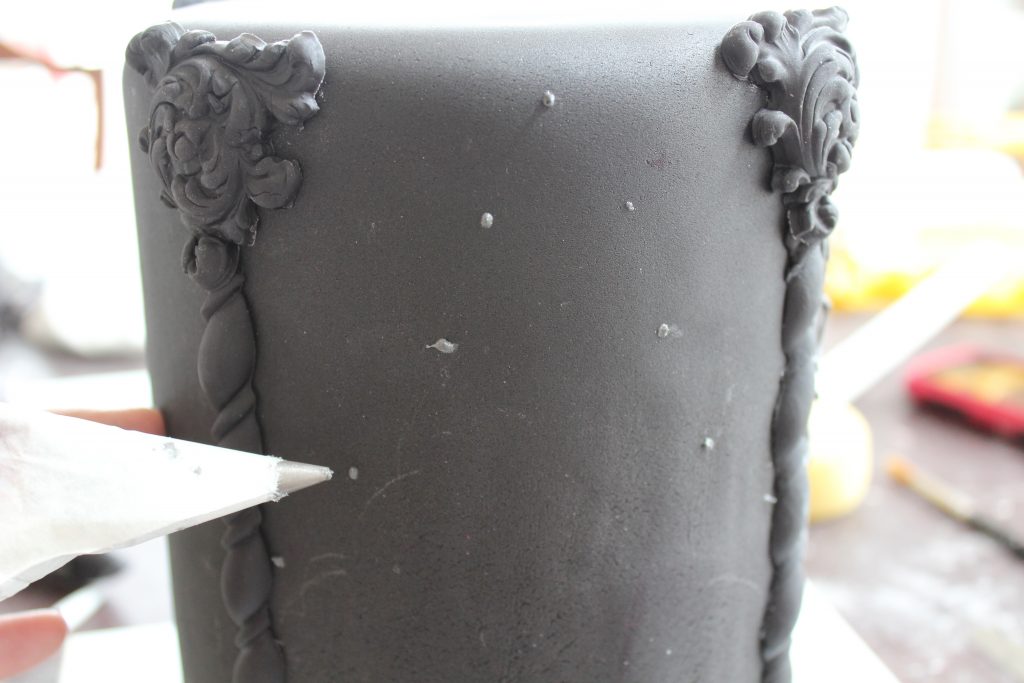
30. Pipe small curved lines connecting each dot, curving toward the rope. It helps to drag the tip a little. Pipe straight lines from top rosette to the point of each curve. Now pipe several curved lines evenly spaced to create a spider web. Repeat around 6” barrel in other 3 open areas.

31. Attach acanthus leaves with royal icing at the base of each rope and centered between the ropes. Eight total. This will cover the joins of the string work.

32. Roll purple fondant out thickly and dust the Left Prime Swirl and Right Prime Swirl molds lightly with cornstarch. Place fondant into mold and roll over with rolling pin to ‘cut’ to size.

33. Attach swirls to half round with water or sugar glue so they meet in any pattern. Mix vodka with black gel food color so it is slightly ‘runny’. Paint swirls with black color.

34. Immediately wipe off excess from the top of the swirl, leaving the black in the creases to create an old weathered look.

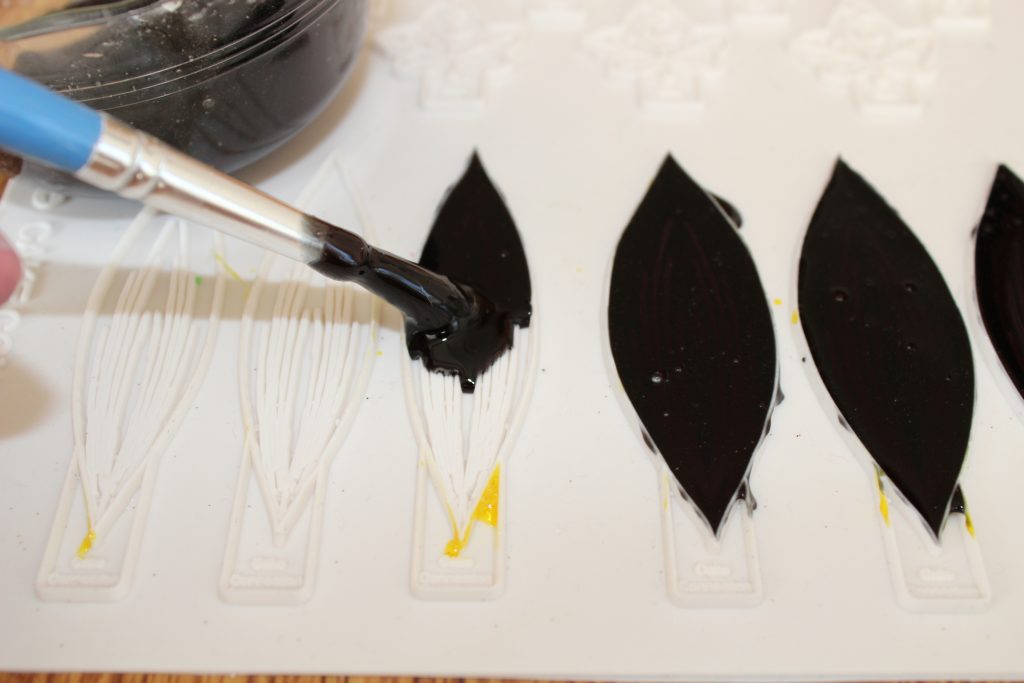
35. Put 2 tablespoons of water into a small microwave safe bowl. Add a drop of black gel food color and sprinkle a scant tablespoon of gelatin over the top. Let sponge for 5 minutes and then microwave for 5 seconds. If not dissolved microwave 5 more seconds. Use a floppy paint brush to paint into silicone leaf molds. If the gelatin pulls away from the silicone, just repaint. Let dry.
36. Cover a 22g white wire with white floral tape.
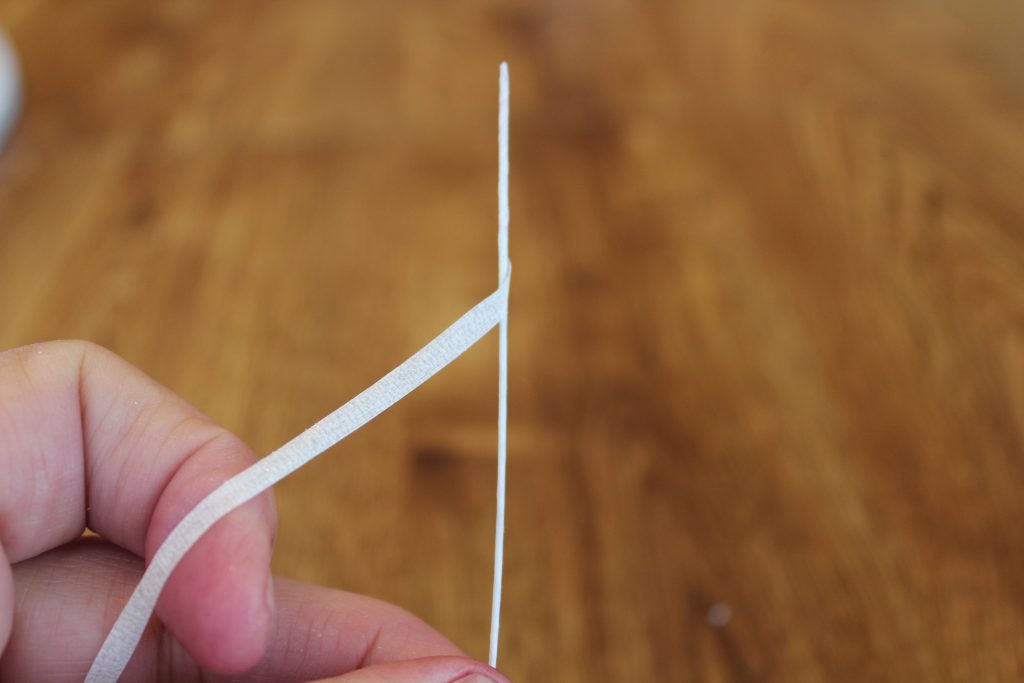
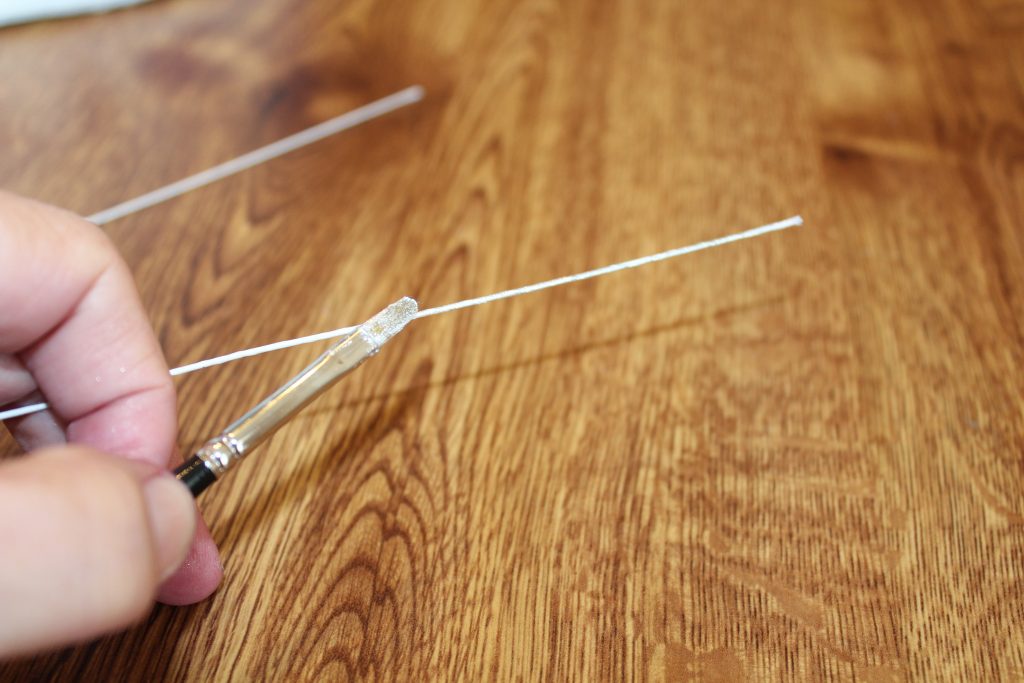
37. Paint with vodka and silver dust.
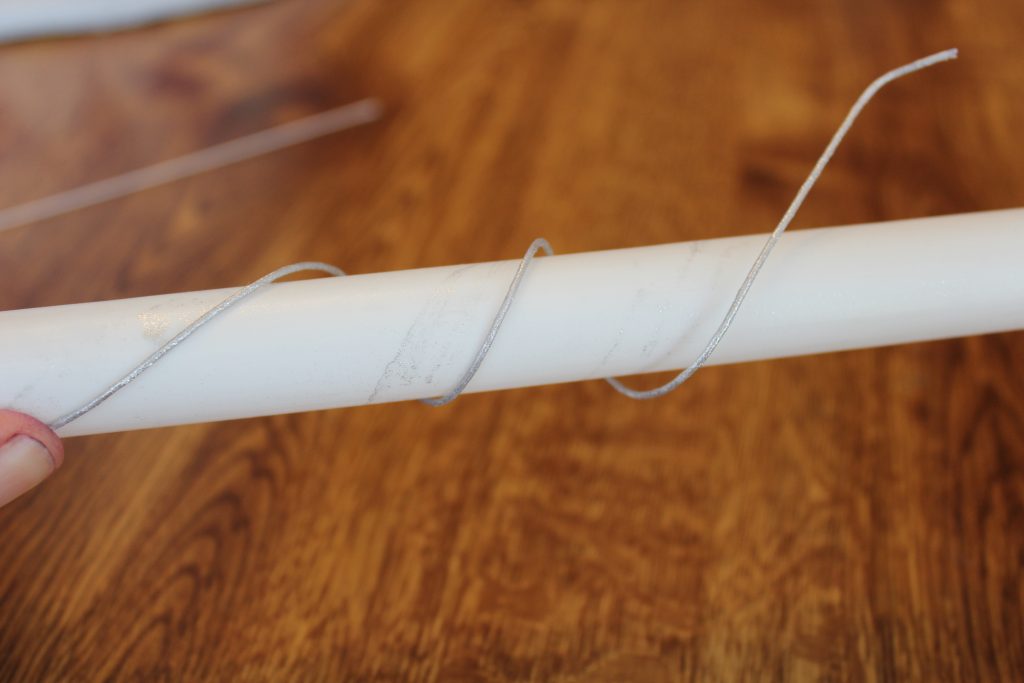
38. Wrap around a round object (like a rolling pin) to create a swirl.
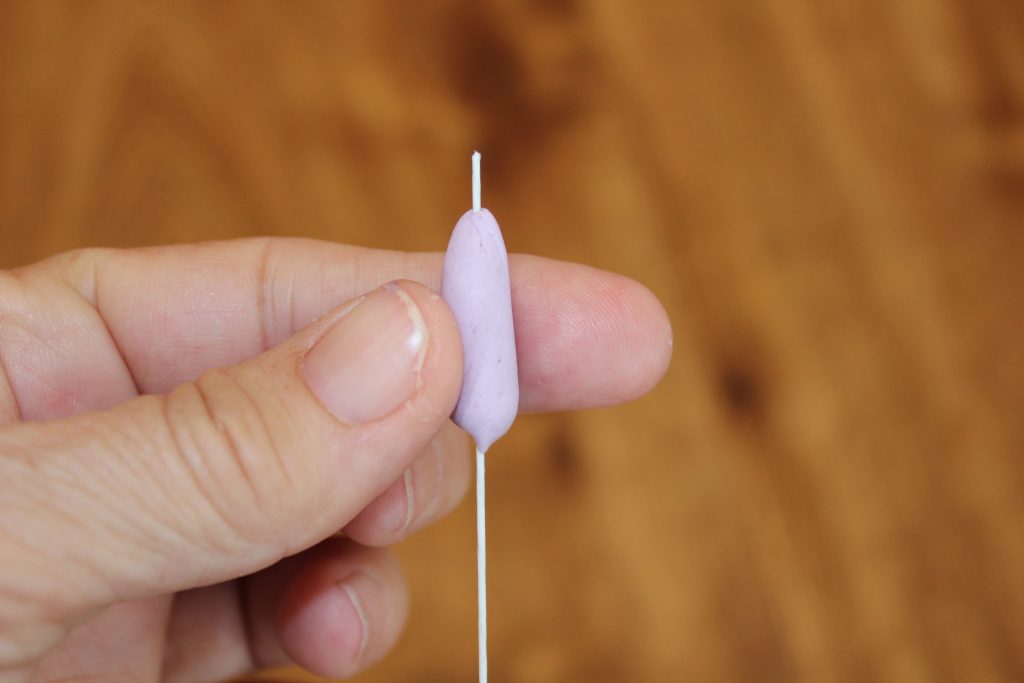
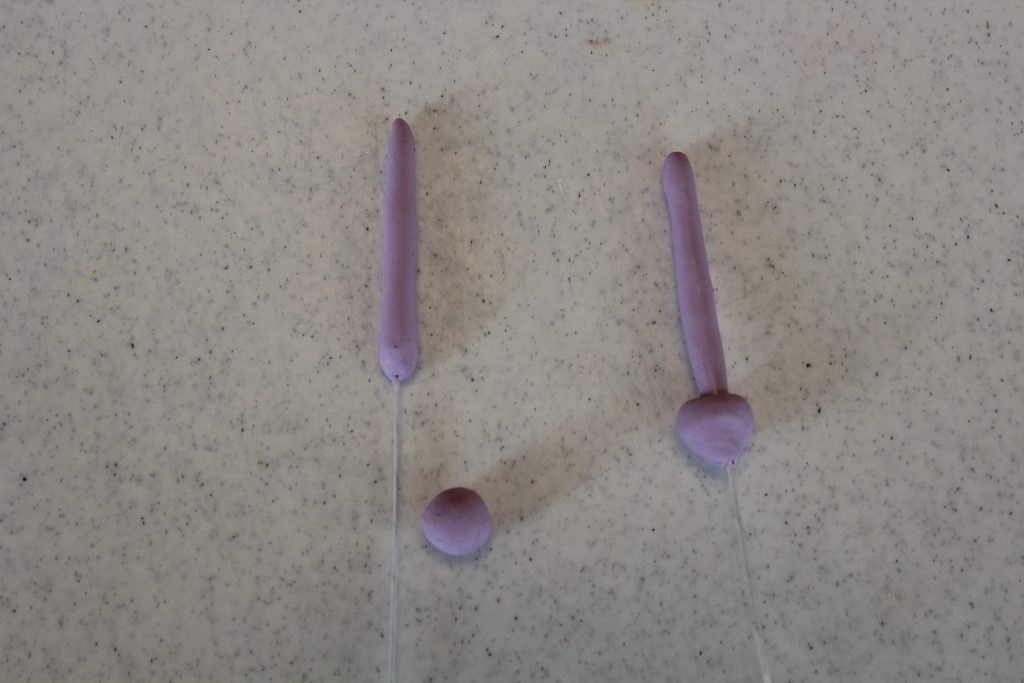
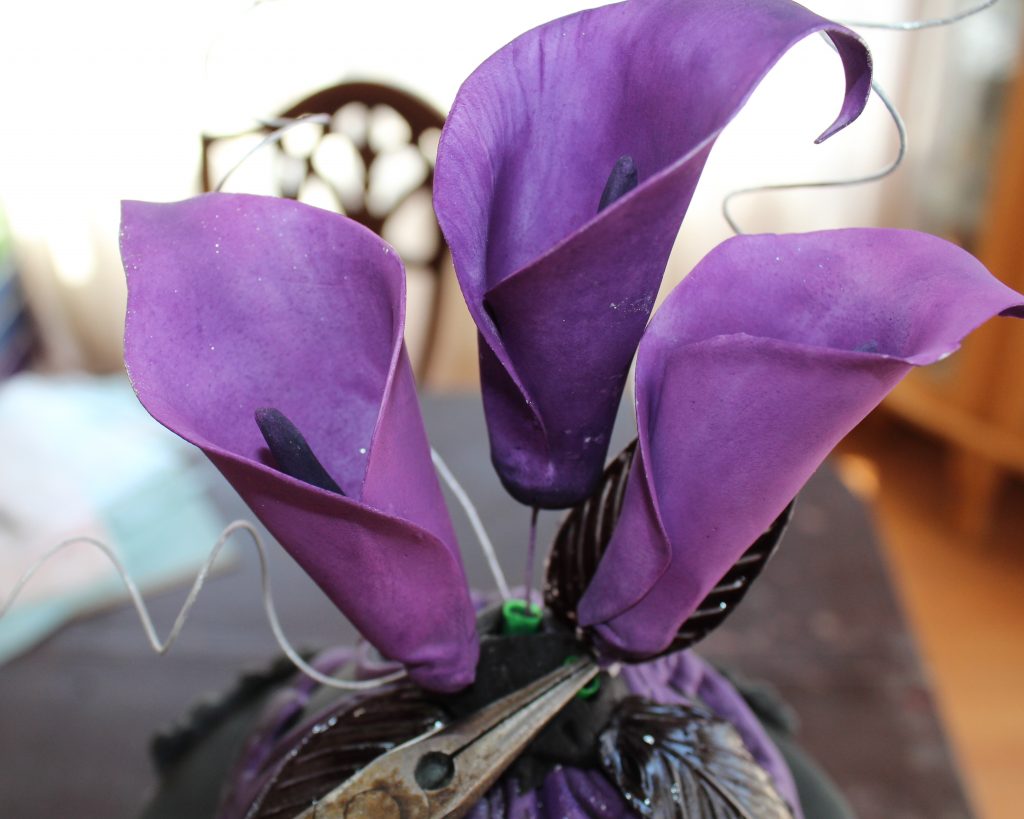
39. On a 22g white wire, make calla lily center by attaching a small amount of purple gum paste. And roll into a 1 ½” long sausage shape.
40. Add a small ball and shape at the base, using sugar glue to attach. Let dry.
41. Dust calla lily center with grape dusting powder.
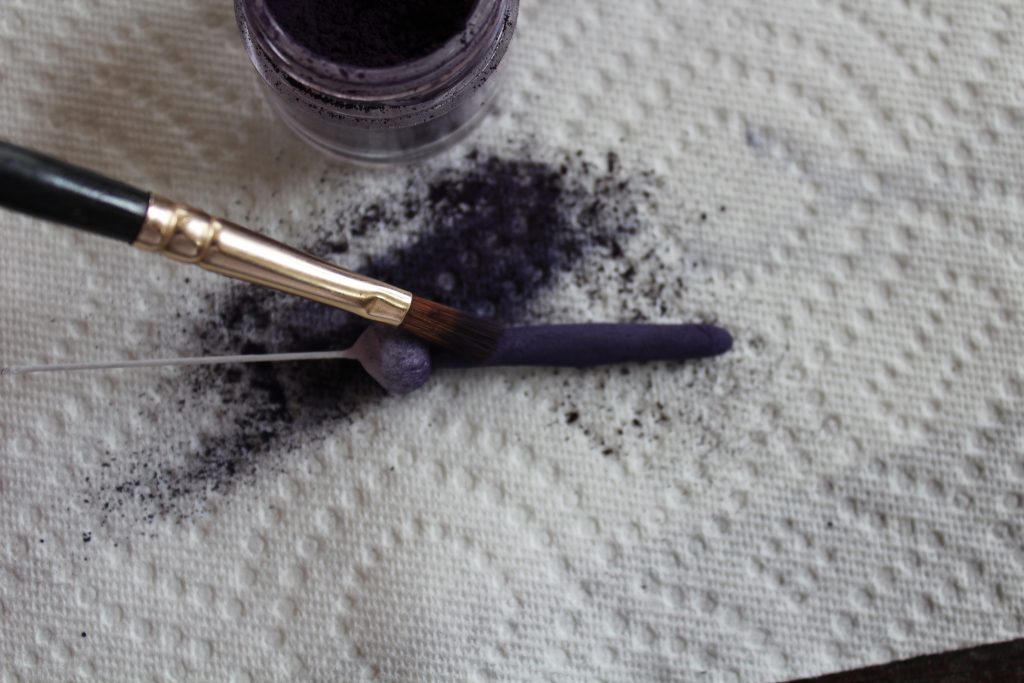
42. Roll out some purple gum paste and cut with a calla lily cutter.
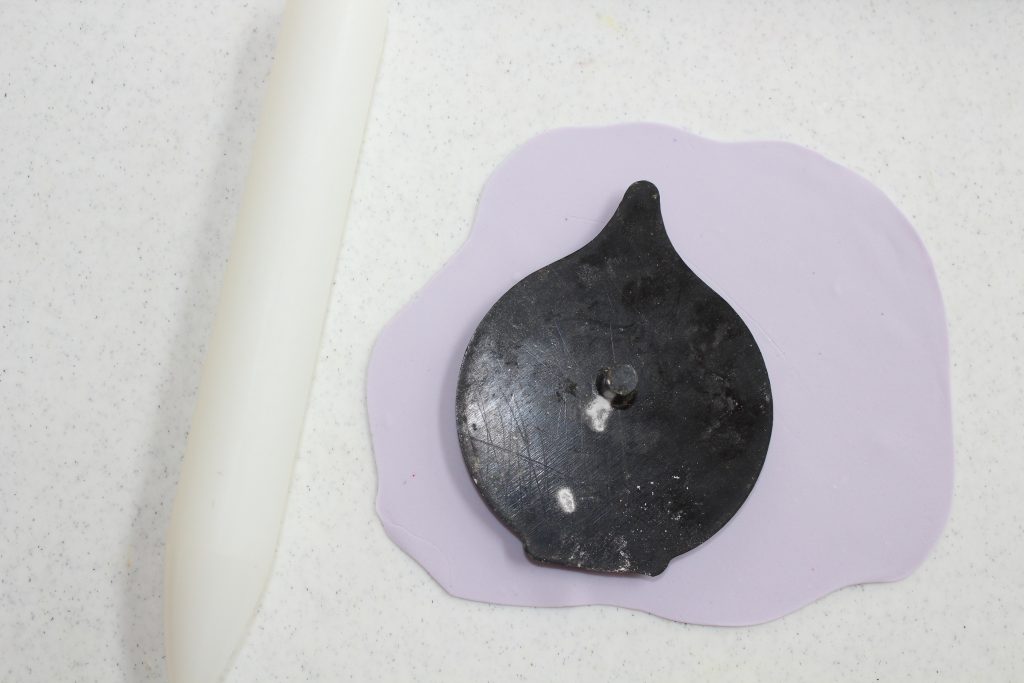
43. Roll over the paste with a silk veining tool.
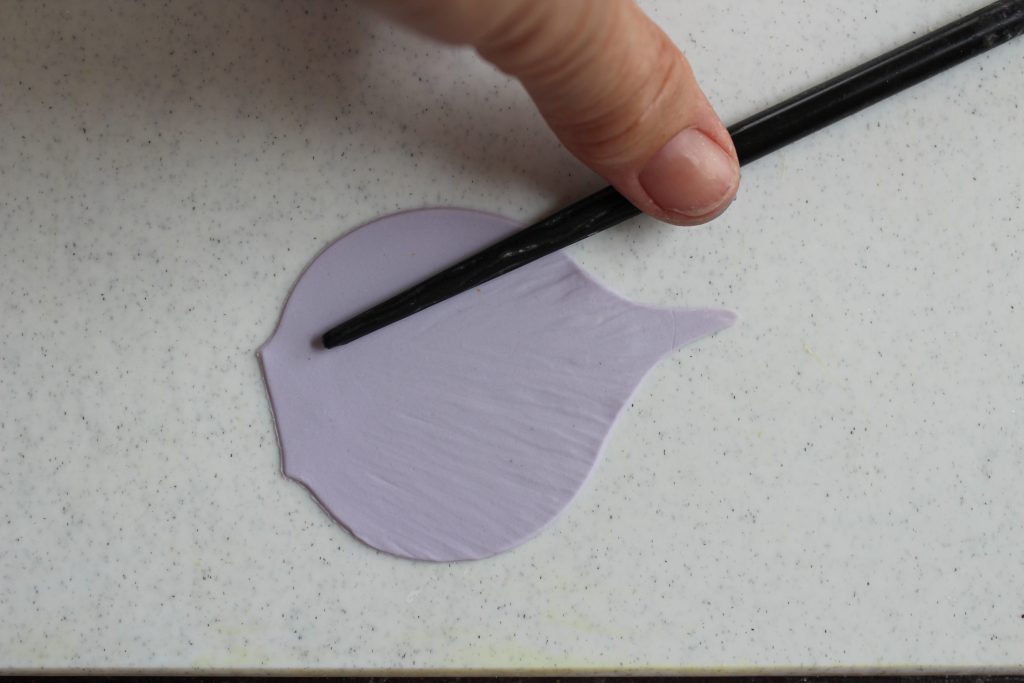
44. Turn lily over (so back side of lily is facing up) and place on a firm pad. Soften the edges of the lily by running a ball tool over the edge of the paste.
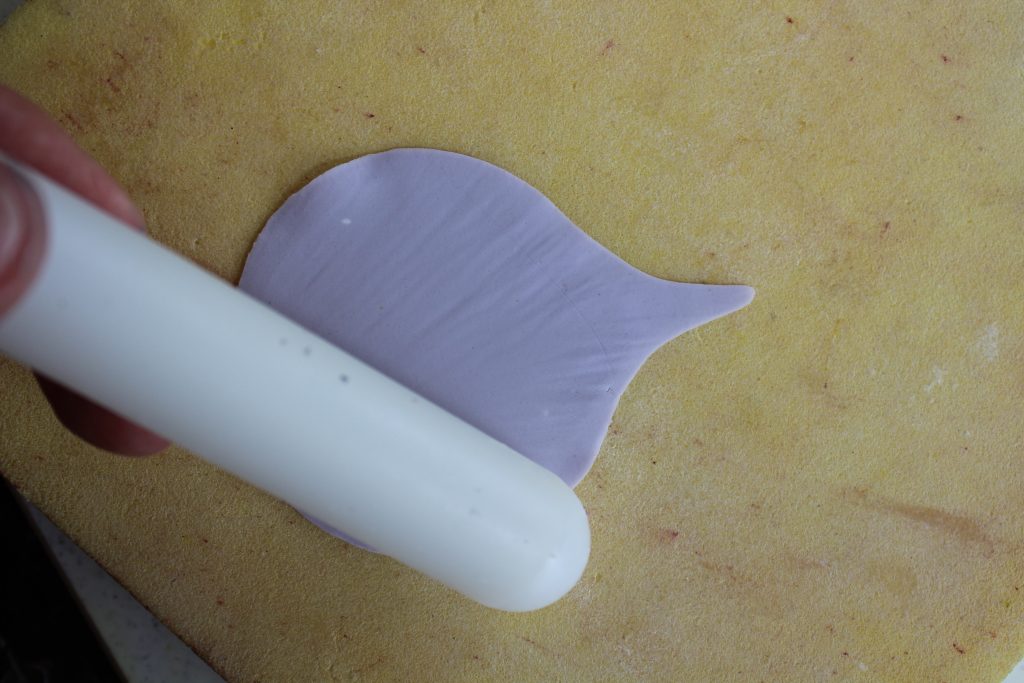
45. Paint front side base of lily with sugar glue to help complete your Halloween wedding cake.
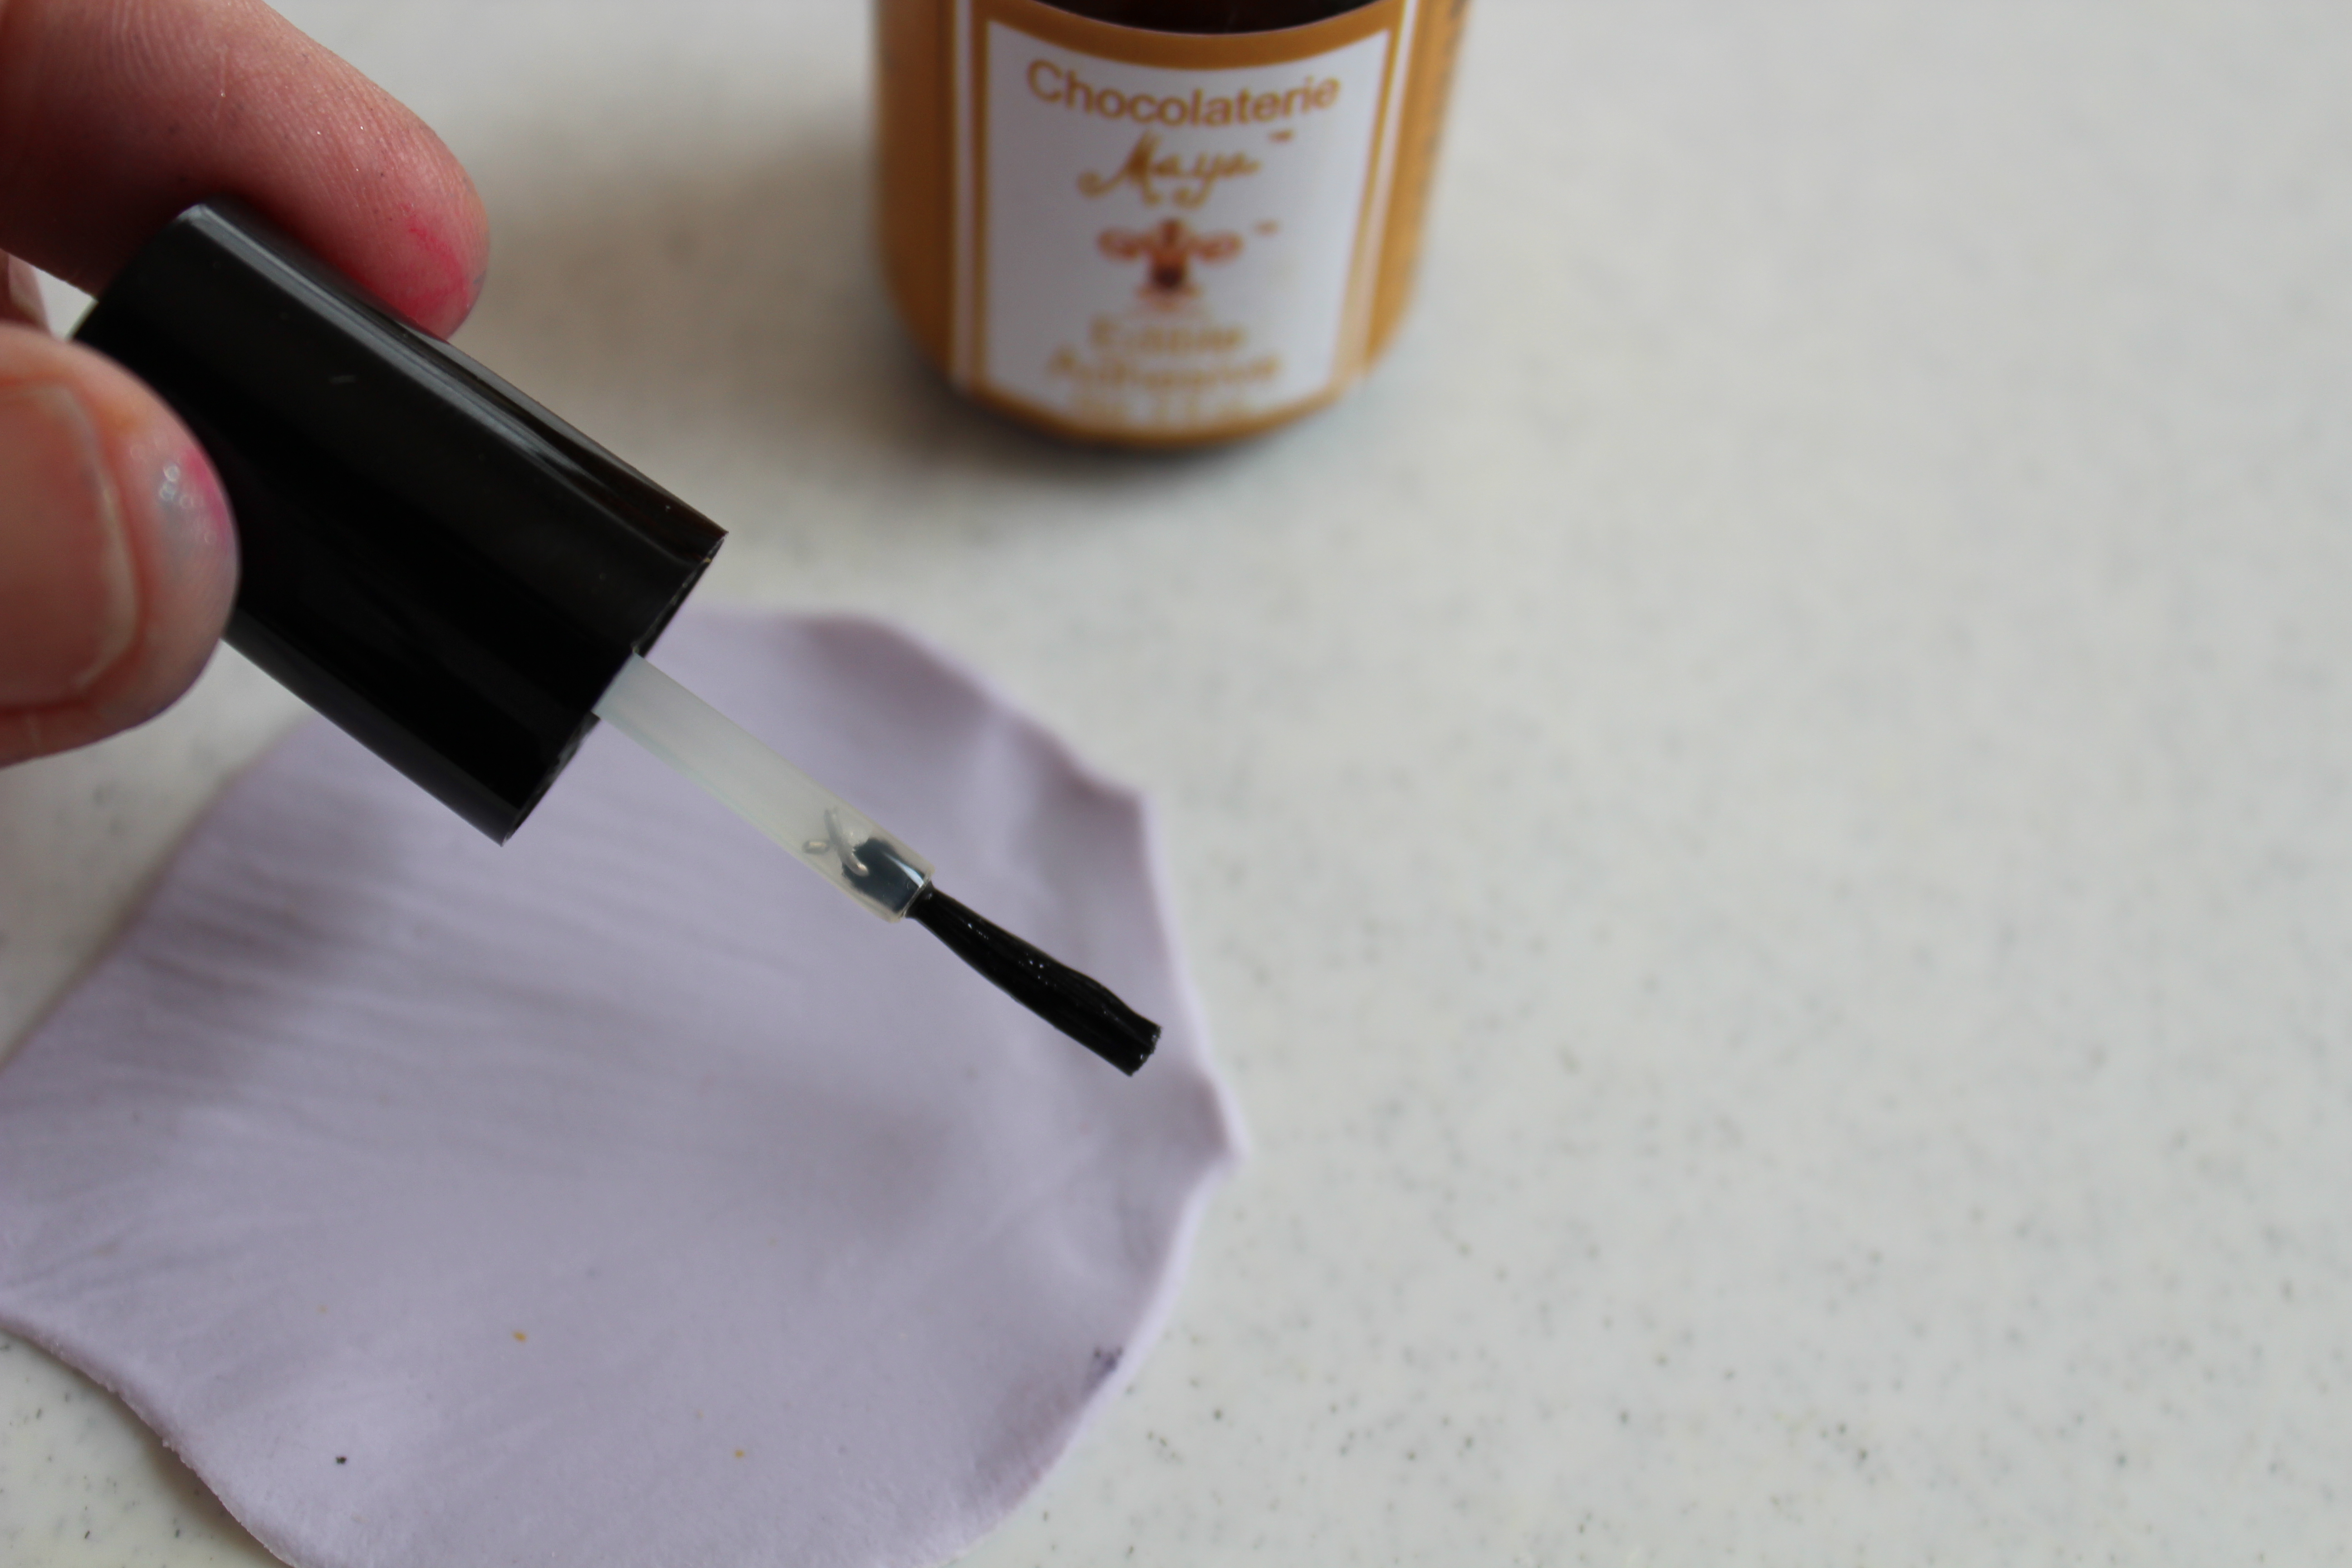
46. Wrap around ball of previously dried center base and mold at the bottom. Shape top and let dry. Sometimes it’s easiest to hang upside down to dry.
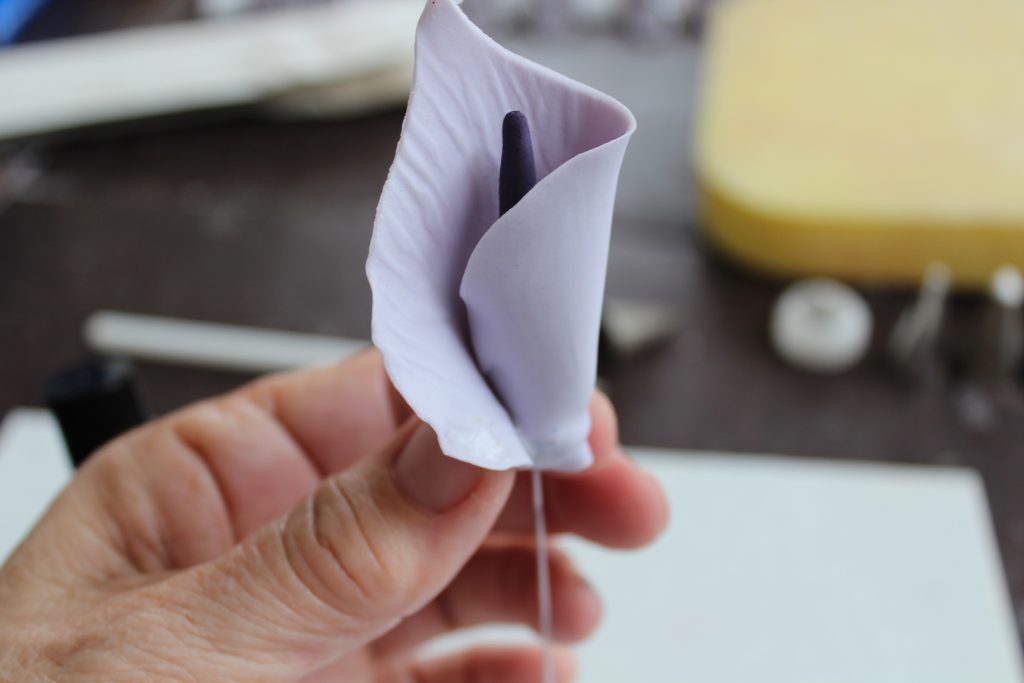
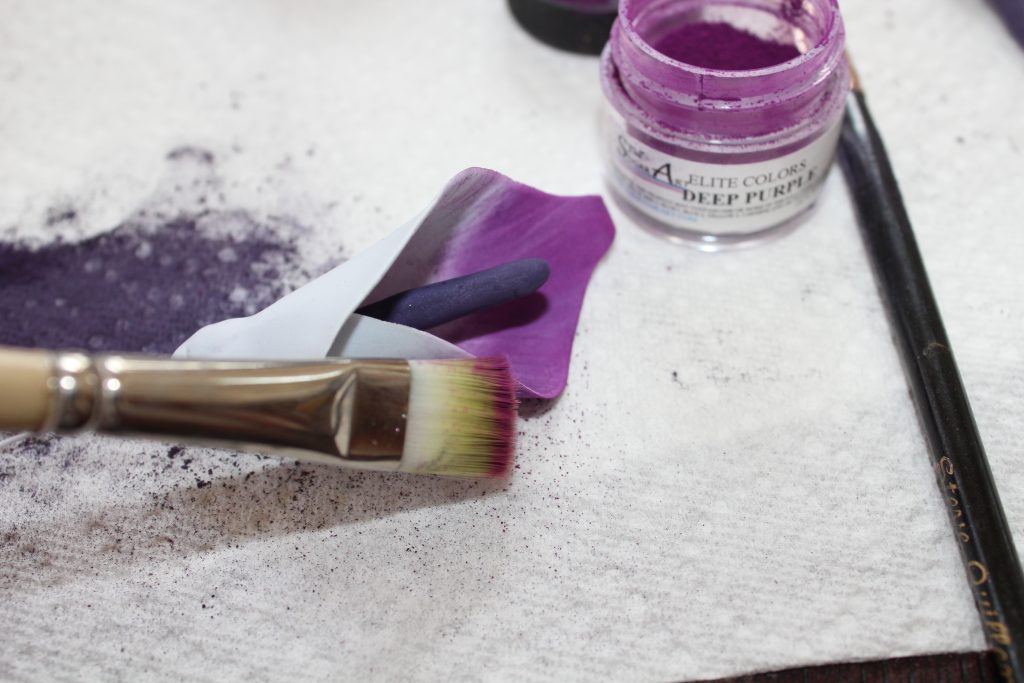
47. Dust lily with deep purple dust color and grape at base and top tip. Lightly steam flowers to set the dust.
48. Place a mound of black fondant into the front of the 6” cake at the base where it meets the 9” cake. Insert the calla lilies into the fondant using straws if needed to protect the cake from wires. Fill in with the gelatin leaves and silver wire swirls.
Finished image of your Halloween wedding cake:
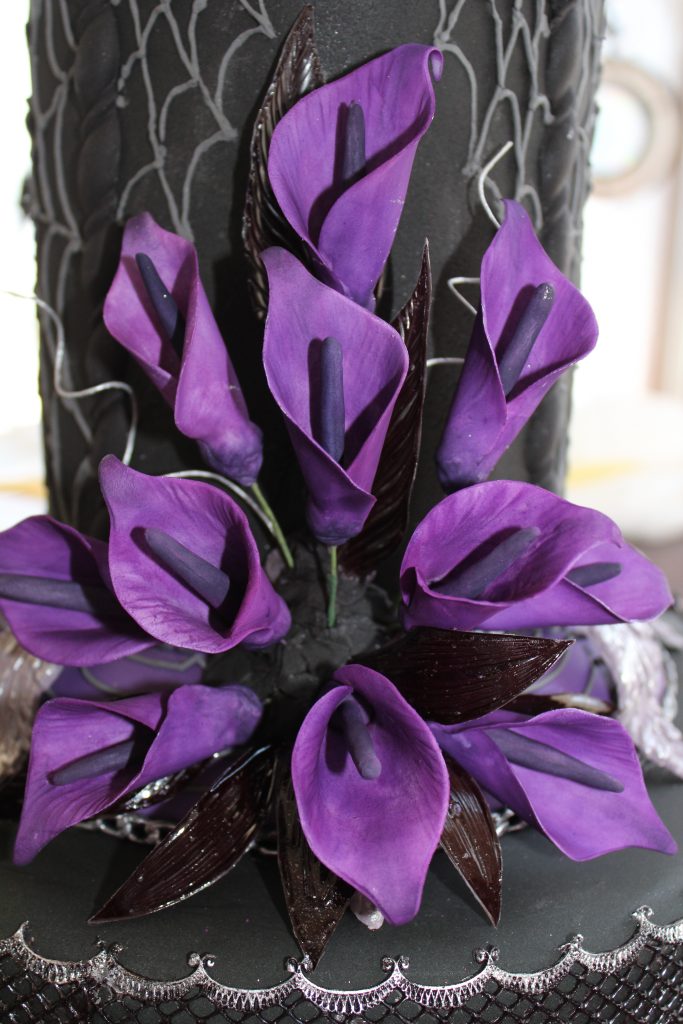
49. Place another small mound of black fondant on top of the 3 ½” half round cake of your Halloween wedding cake. If needed, straws should be used in the cake to insert the wires in to protect the cake. Place 3 calla lilies, leaves and silver swirls into mound and/or straws.
Do you have a collection of favorite Halloween Wedding cake ideas? If so, please share them below.
[content-egg-block template=offers_list]
The thumbnail really caught my attention, it’s so lovely and sophisticated! Then I scrolled down and saw how the steps are so intricate and complex. Seems like a daunting task but a challenge I would like to take. Crossing my fingers that as long as I follow the steps I get work as lovely as yours. Ha ha !